
Create a Schedule
In order to be able to create a new schedule for a register transaction, make sure the Connector processing the transactions is configured to be Available for Schedule (see Create and Assign Connectors & Adapters)
Create a new Schedule
New schedules for transactions can either be created via API (see our Schedule API documentation) or via the User Interface.
To create a new schedule in the User Interface, follow these steps:
- Navigate to the Schedules Overview
- Click + New Schedule. You can decide, wether you want to create a new schedule using an existing Registration ID (Transaction UUID of a Register) or the Virtual Terminal.
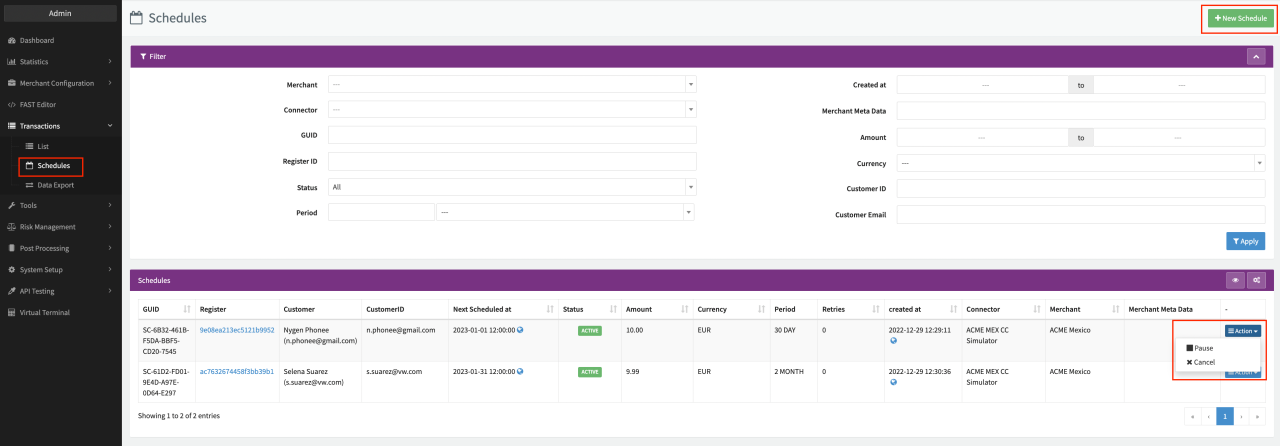 Schedules Overview
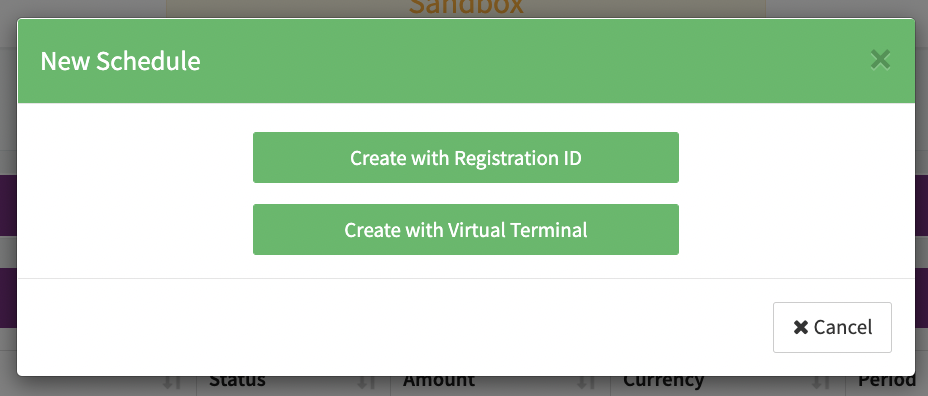 New Schedule
Create a Schedule with Registration ID
- Fill in a Registration ID (Transaction UUID of a Register Transaction)
- Fill in an Amount and select a Currency for the recurring debit transactions (follow-up transactions)
- Select a Start Date Time (UTC) for the schedule. The first recurring debit (follow-up transaction) will be initiated for this date and time.
- Define the schedule interval (Period Length and Period Unit) for the recurring debits (follow-up transactions). After each interval the next transaction will be initiated (see Pause, Continue, Retry or Cancel for options to edit a schedule)
- Period Length
- Period Unit - Day, Week, Month, Year.
- Click + Create to save your schedule
A schedule confirmation with the Schedule ID and Scheduled at date will be shown and the schedule will appear in the Schedule Overview.
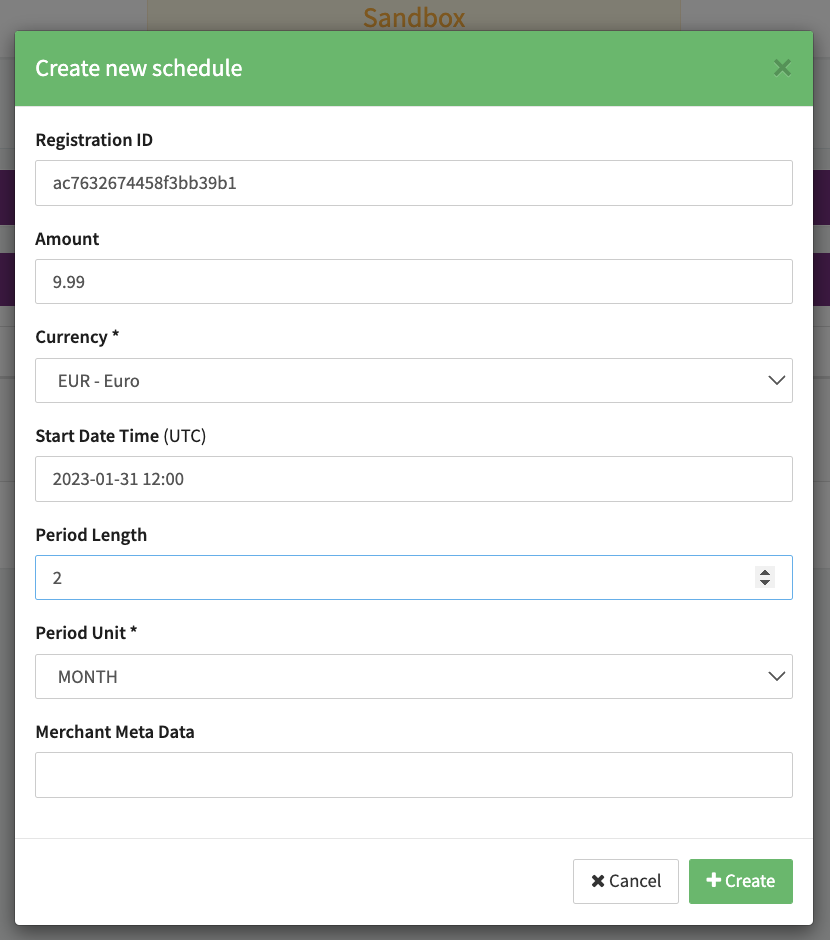 Create schedule with Registration ID
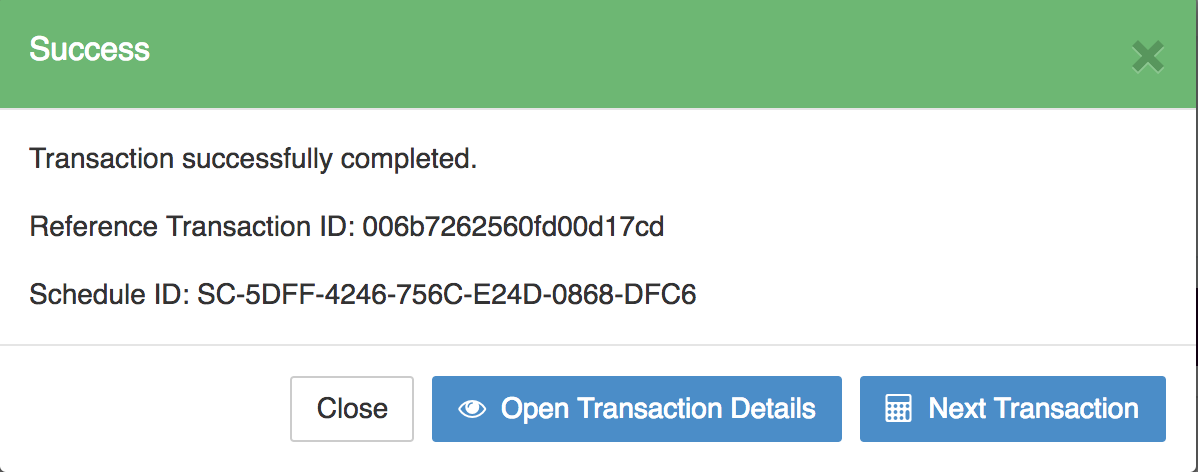 Schedule Confirmation
Keep in mind that for recurring debits the defined interval (Period Length and Period Unit) is scheduled based on the last processed transaction. If for any reason the processing of a transaction initiated by the schedule is delayed in regards to the initial defined Start Date Time, the next transaction initiated by this schedule will be delayed too.
If you want to get access to all IXOPAY platform features you need to upgrade your plan. Please contact our Support Team in the IXOPAY Customer Experience Portal for more information.
Create a Schedule with Virtual Terminal
In order to be able to create a new schedule for a register transaction using the Virtual Terminal, make sure the Connector processing the transactions is configured to be Available on Terminal (see Create and Assign Connectors & Adapters).
You will get redirected to the Virtual Terminal section of the IXOPAY platform where you can select the
- (Sub-)Tenant
- Merchant
- Connector
to be used create a new schedule for a register transaction and click Virtual Terminal or Pay By Link, depending if you want to create a payment link for the customer. Fill in the necessary parameters for the schedule to be created in the Scheduler Form :
- Transaction
- Credit Card
- Additional Transaction Data
- Start Schedule
- Customer
- Additional Customer Data
- Customer Billing Data
- Customer Shipping Data
- Items
Click Reset Form to reset the form and enter different values or Choose another Connector to get back to the (Sub-)Tenant, Merchant, Connector selection page.
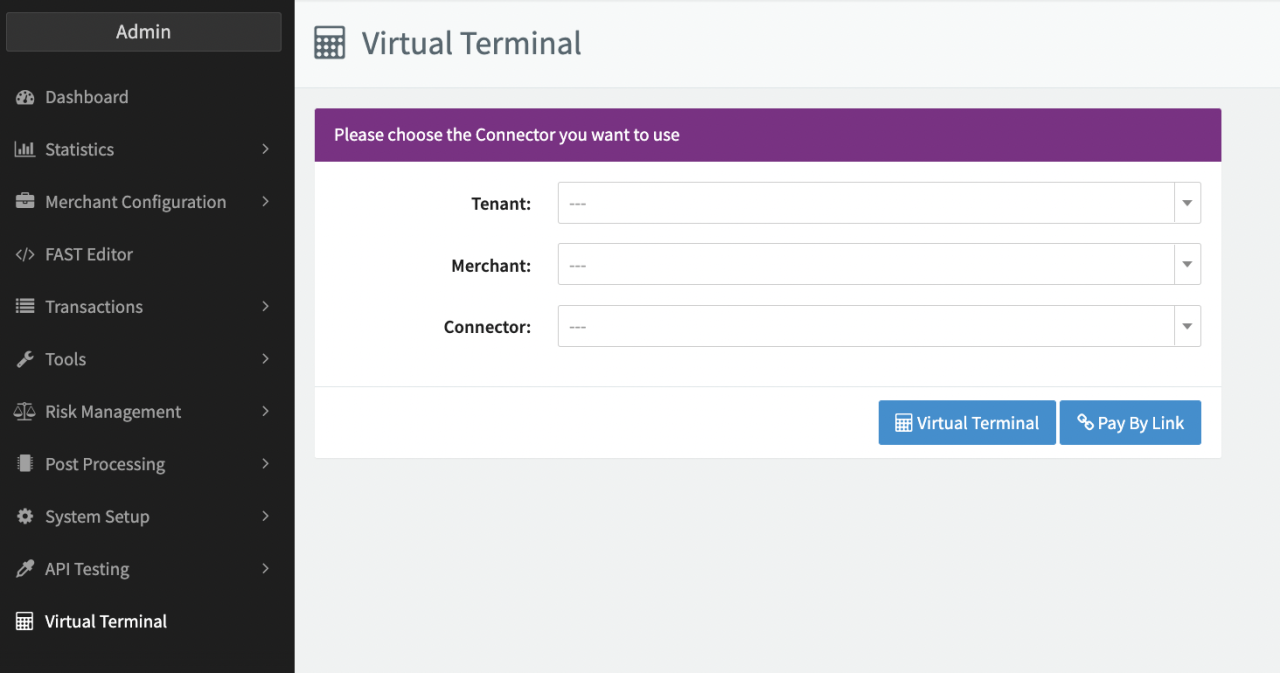 Virtual Terminal
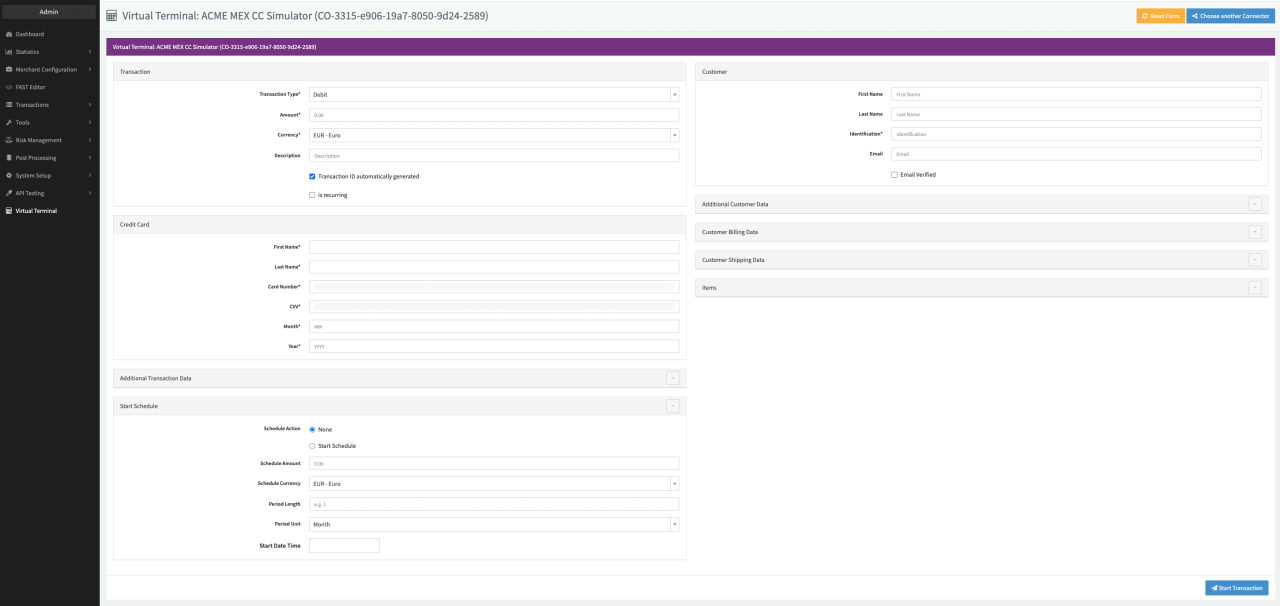 Scheduler Form Virtual Terminal
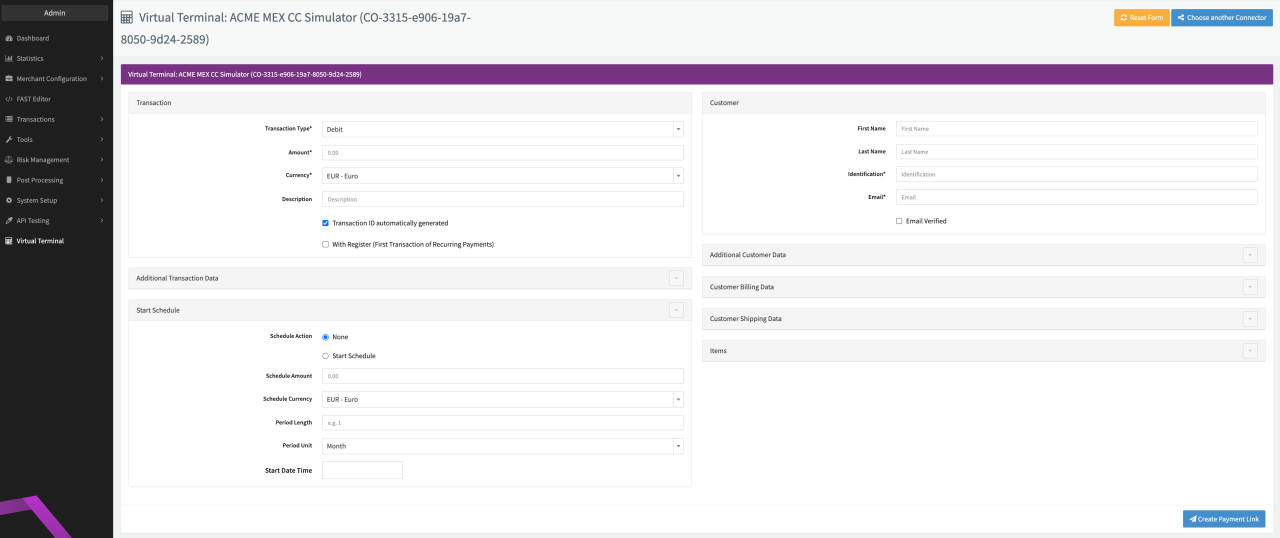 Scheduler Form Pay By Link
Transaction
In this section you can configure Transaction Details regarding the scheduled Transaction (see Transaction Table).
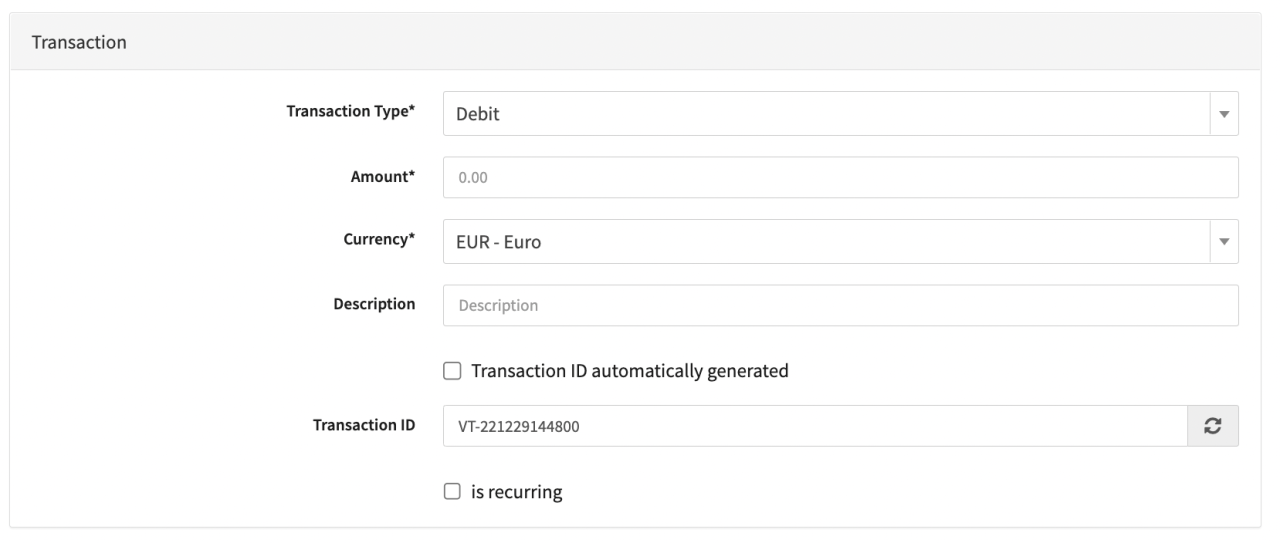 Transaction ID automatically generated
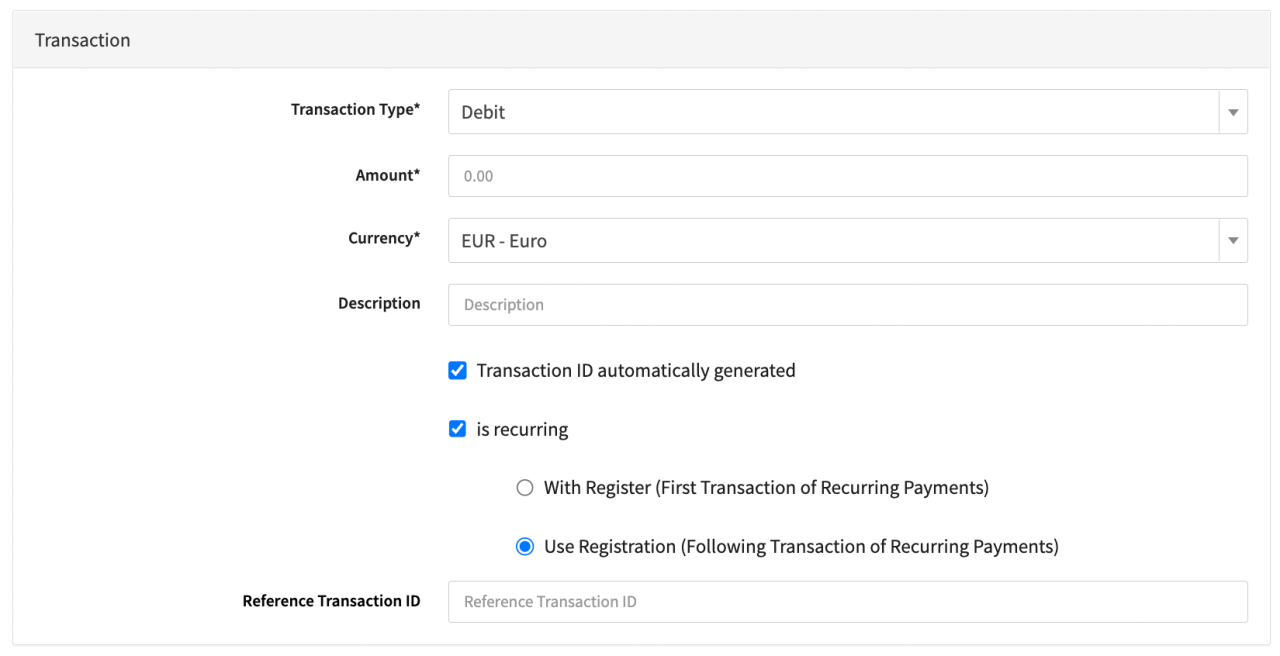 Is Recurring
Credit Card
In this section you can fill in the Creditcard Details regarding the scheduled Transaction (see Creditcard Table). This section is hidden in the Pay By Link Scheduler Form.
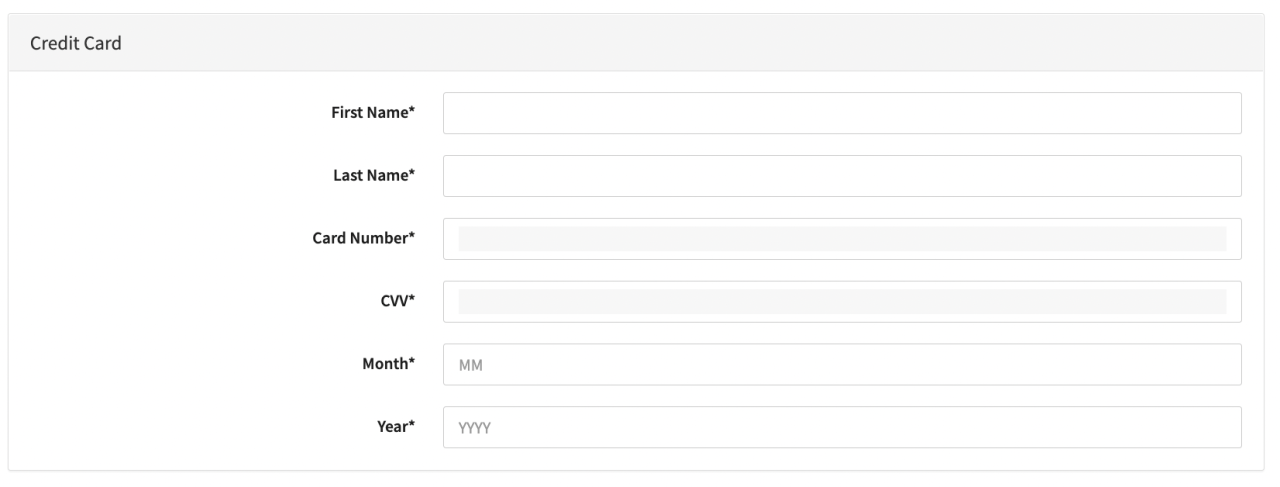 Credit Card
Additional Transaction Data
In this section you can fill in the Additional Transaction Data (optional) regarding the scheduled Transaction (see Additional Transaction Data Table).
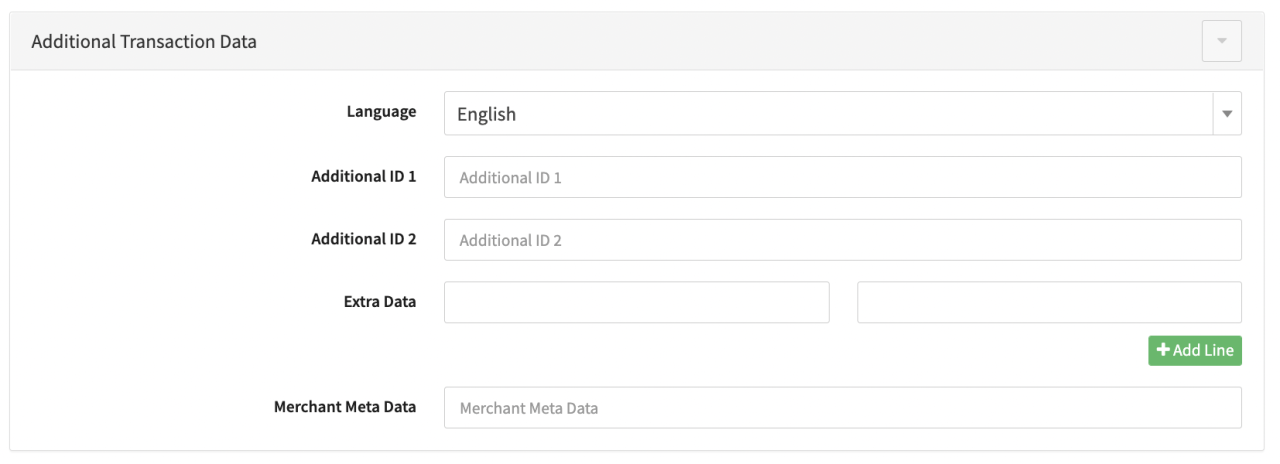 Additional Transaction Data
Start Schedule
In this section you can fill in the Details regarding the Schedule itself (see Start ScheduleTable).
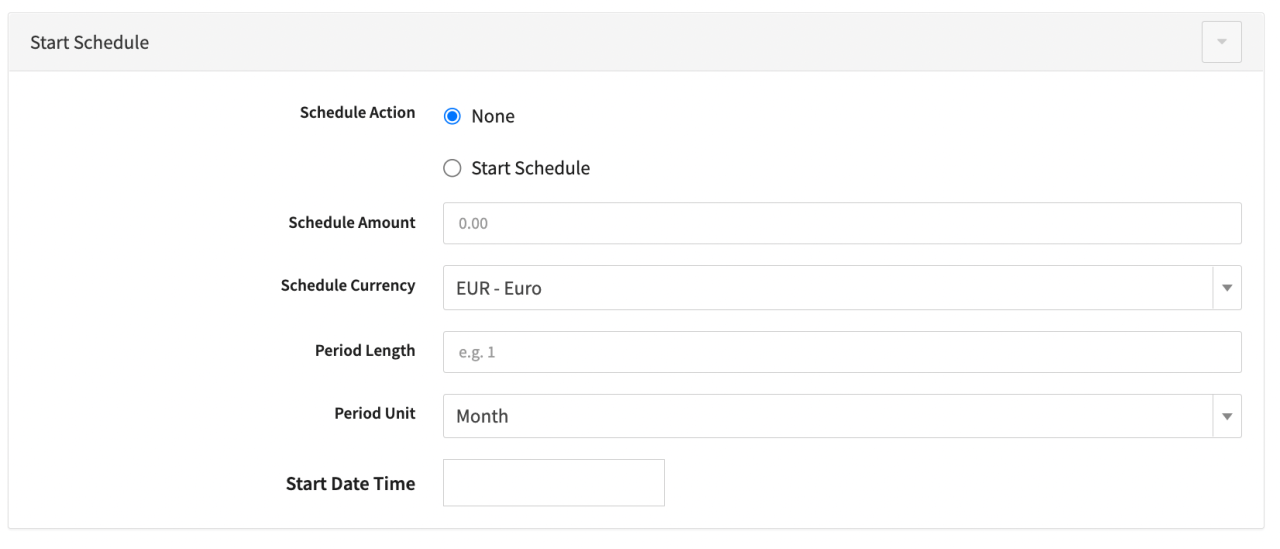 Start Schedule
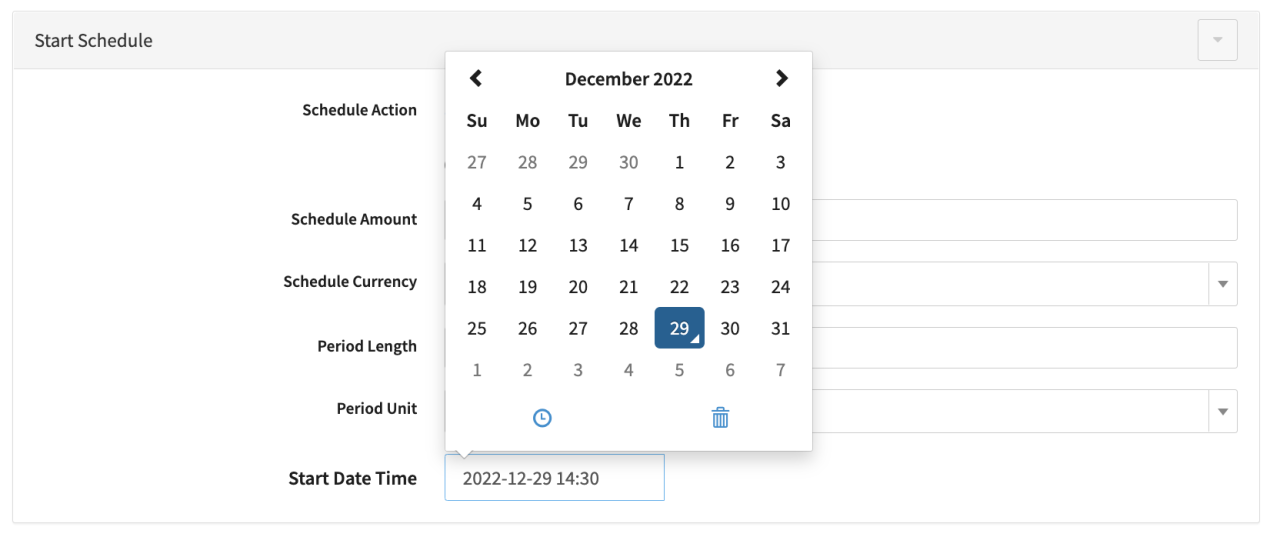 Start Date Time
@@CALLOUT_OPEN|info|@@
For debit transactions the Start Date Time must be greater than 24 hours from the schedule creation, otherwise the request will fail because the period between the initial and the follow-up transaction must be greater than 24 hours.
Keep in mind that for recurring debits the defined interval (Period Length and Period Unit) is scheduled based on the last processed transaction. If for any reason the processing of a transaction initiated by the schedule is delayed in regards to the initial defined Start Date Time, the next transaction initiated by this schedule will be delayed too.
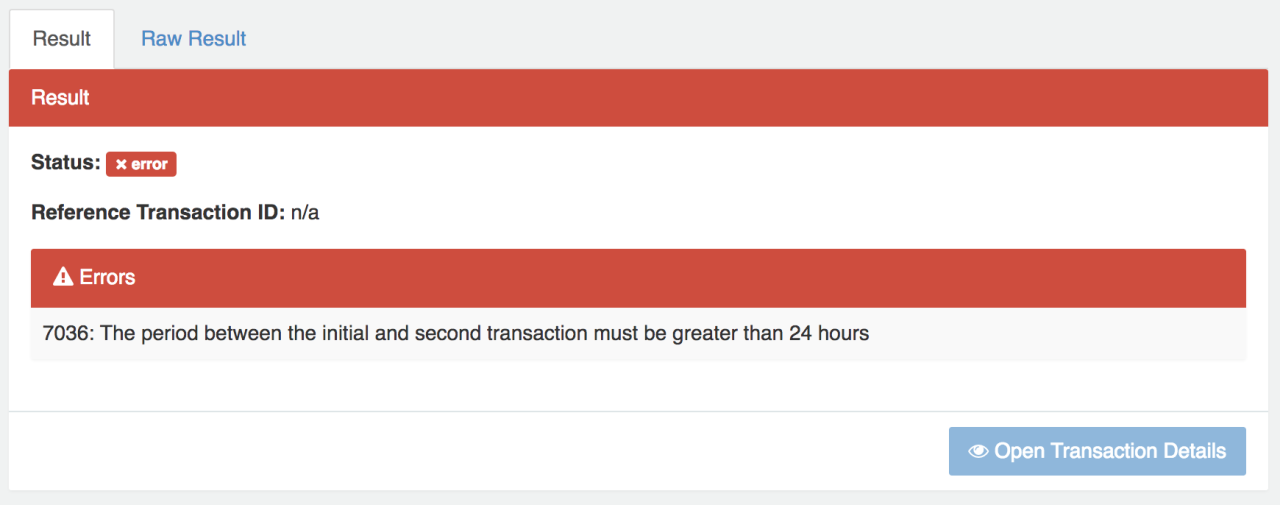 Create Schedule: Invalid Period
Customer
In this section you can fill in Customer Details regarding the scheduled Transaction (see Customer Table).
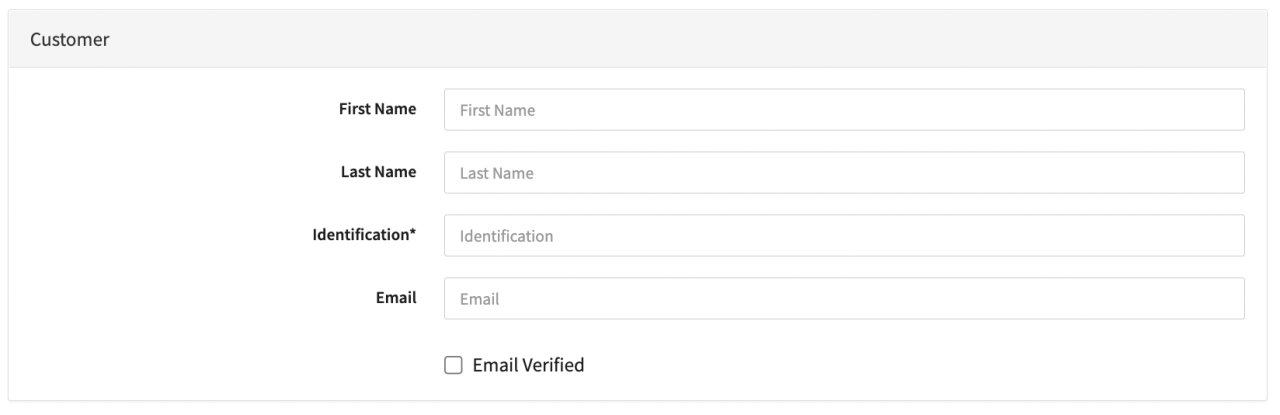 Customer
Additional Customer Data
In this section you can fill in additional optional Customer Details (see Additional Customer Data Table).
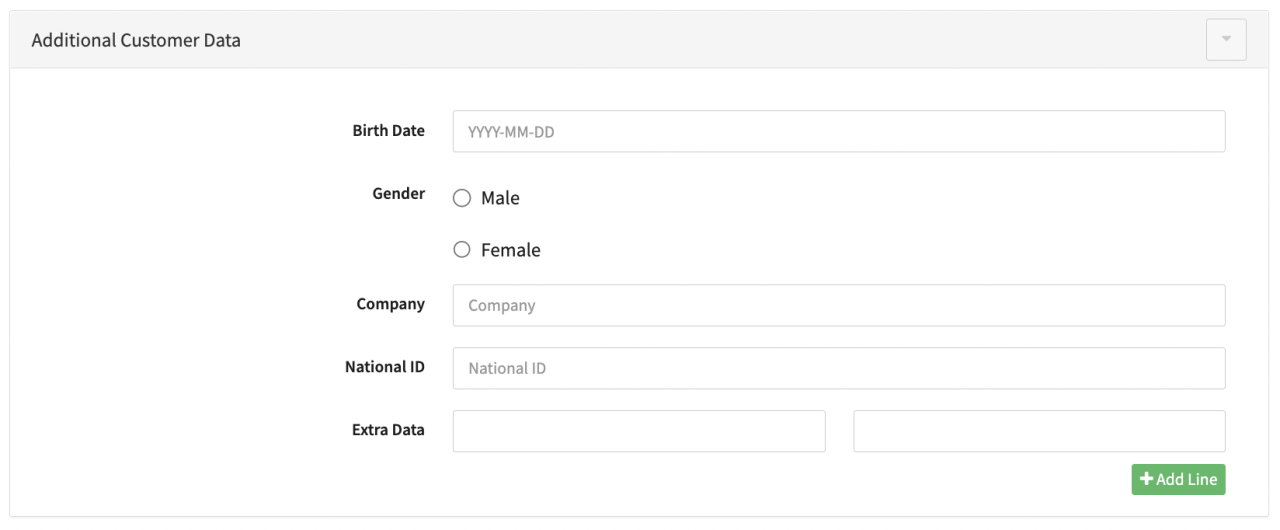 Additional Customer Data
| Field | Description |
| ----------- | --------------------------------------------------------------------------------------------------- | | Birth Date | Fill in the Customers Birth Date in the format YYYY-MM-DD | | Gender | Select optional Male or Female | | Company | Fill in the Customers Company | | National ID | Fill in the National ID | | Extra Data | Fill in additional Key-Value Extra Data pairs. Add new Extra Data lines by selecting + Add Line |
Customer Billing Data
In this section you can fill in additional optional Customer Billing Details (see Customer Billing Data Table).
Customer Shipping Data
In this section you can fill in additional optional Customer Shipping Details (see Customer Shipping Data Table).
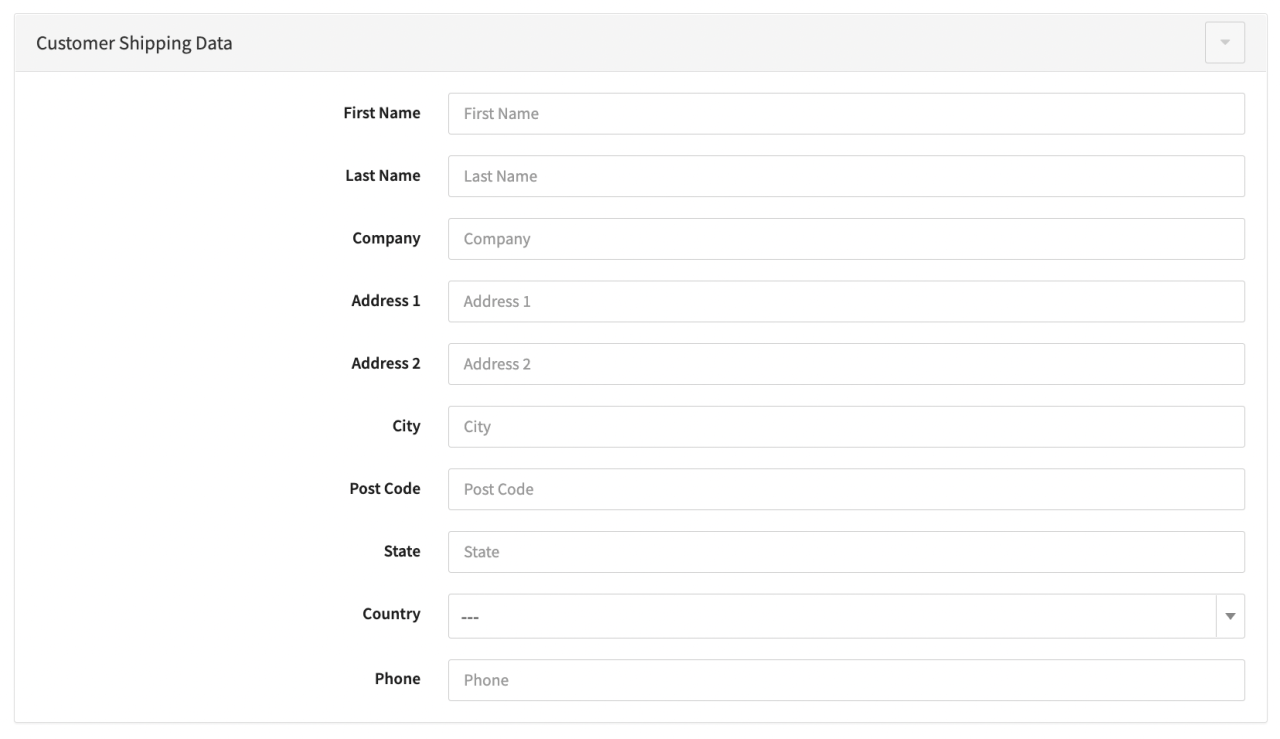 Customer Shipping Data
Item
In this section you can fill in additional details about Items (see Items Table). Click +Add Item to add additional items
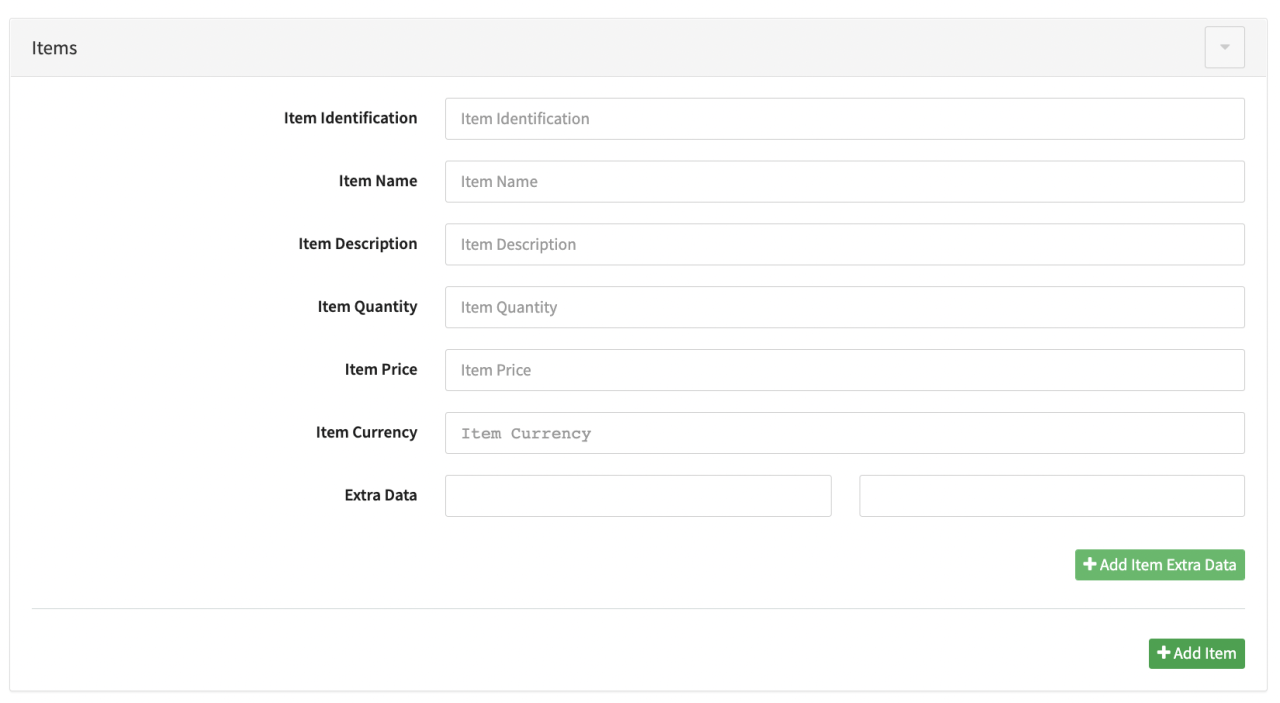 Items
Items
Create the Schedule by clicking Start Transaction in the Scheduler Form. A schedule confirmation with the Schedule ID, (Reference) Transaction ID will be shown and the schedule will appear in the Schedule Overview.
Schedule Confirmation
Alert Settings for Schedules
You can subscribe to Alert Notifications in case a scheduled transaction changes to an error state. Follow these steps to subscribe to Schedule Alert Notifications:
- Open the Alert Settings by clicking the Bell Icon in the top right corner of the Navigation Bar, clicking the Gear-wheel Icon
- In the Scheduler section set up your alerts as needed (see Manage and Visualize Alerts for more information)
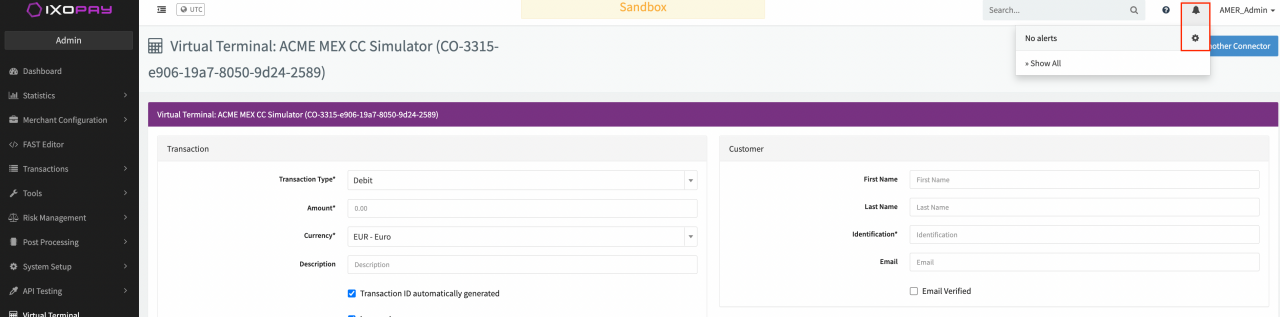 Alert Settings
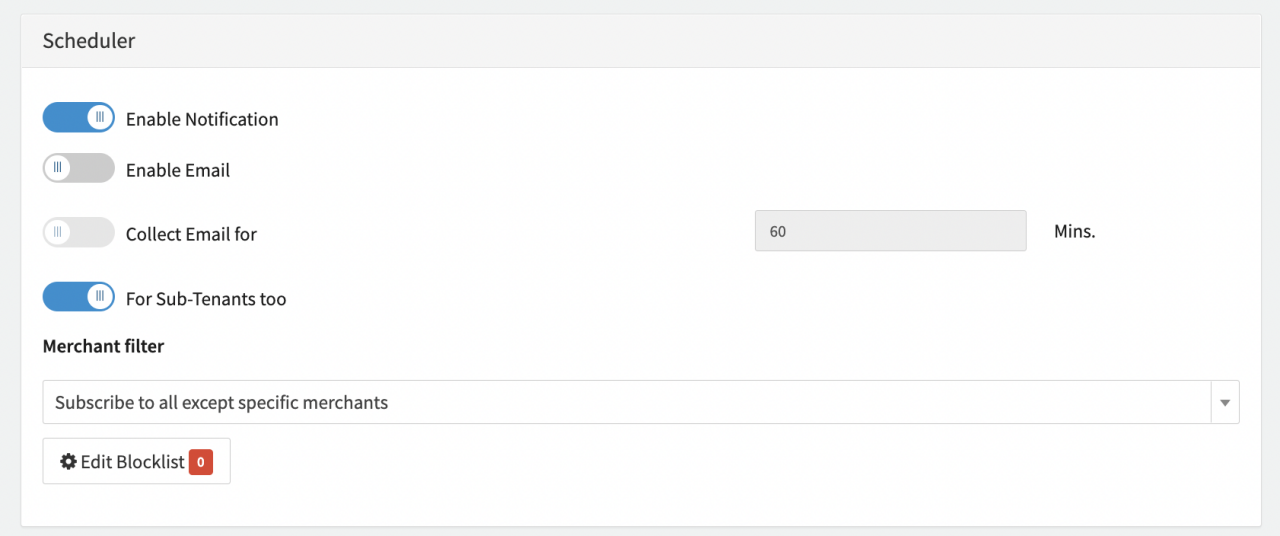 Scheduler