
FAST Editor
Setup
You can create payment templates using the FAST Editor for adapters and payment methods that support (or require) payment form rendering, as well as email templates for adapters (e.g. Pay-By-Link).
General
When the consumer is redirected to the payment page, the gateway determines which template to use based on the following rules.
The template path contains variables which are determined dynamically:
LAYOUT_NAME: You can define a Custom Payment Template Layout in the connector settings. If none is specified, the default layout is used. You can also define a layout for email templates for pay-by-link in the Pay by Link tab in the connector’s configuration.ADAPTER_KEY: Each Adapter requires its own templates. The available placeholders differ for each adapter.LANGUAGE: The merchant can include the desired language in the API call (see the Transaction API Documentation). If a template does not exist for the specified language, the default language defined in the connector’s configuration is used instead. Languages are specified using 2-letter ISO codes, e.g. “en” for English, “de” for German, “es” for Spanish etc.
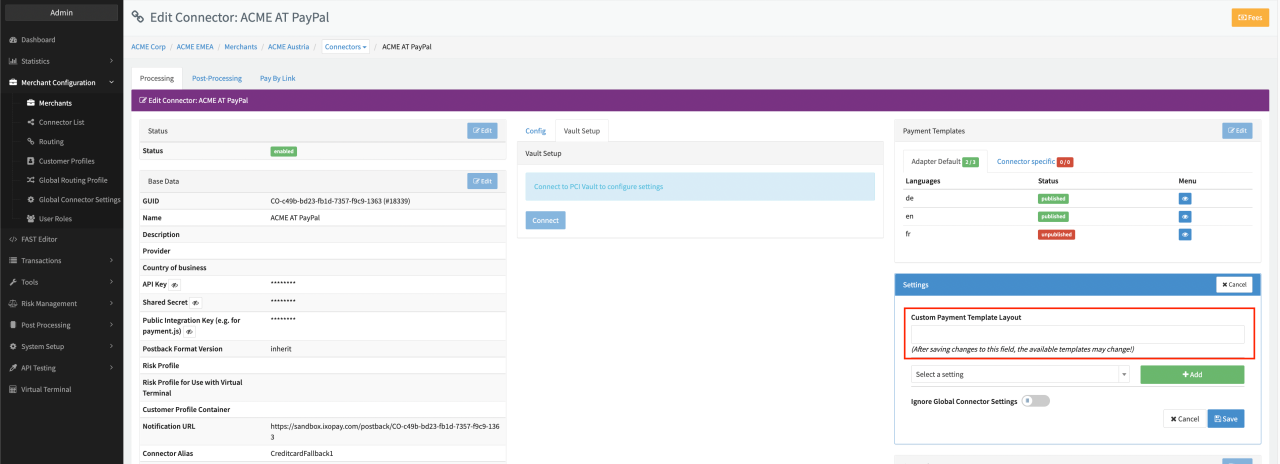 Connector Settings Layout
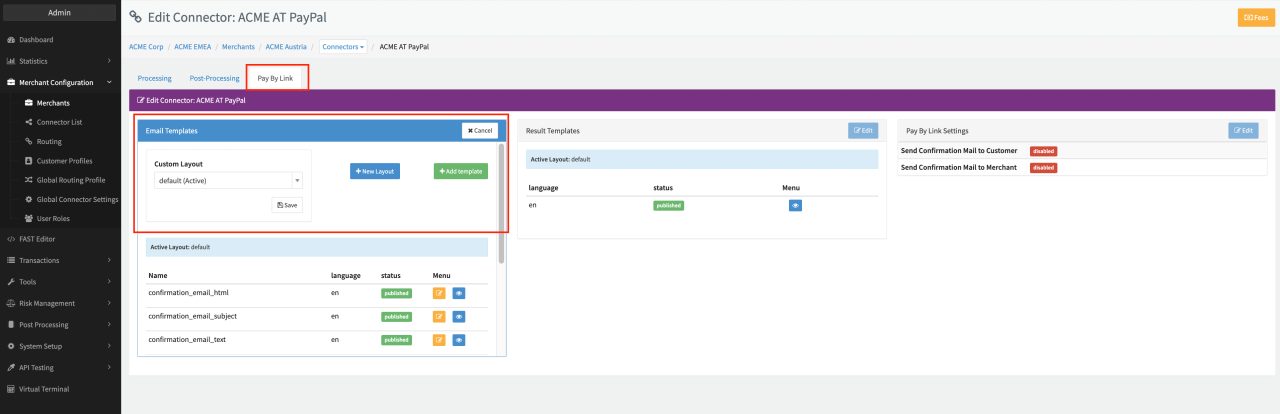 Pay by Link Layout
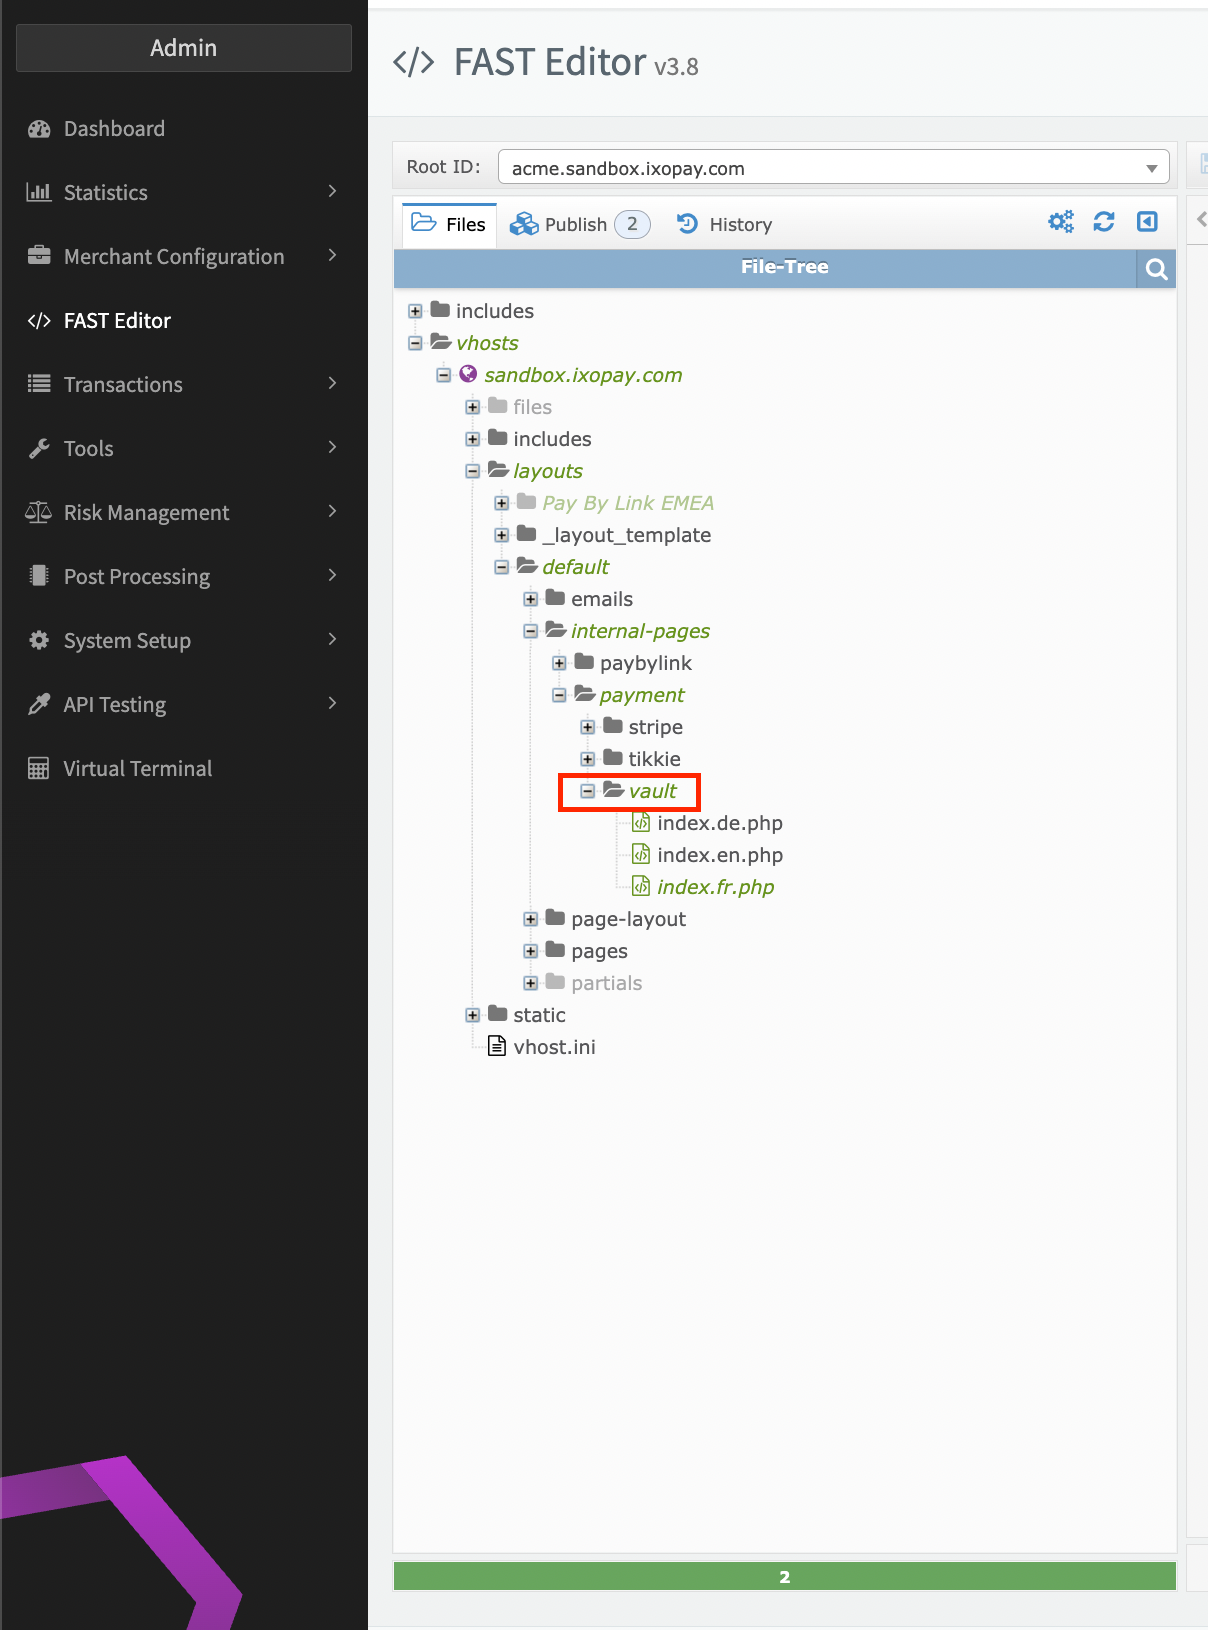 Adapter Key
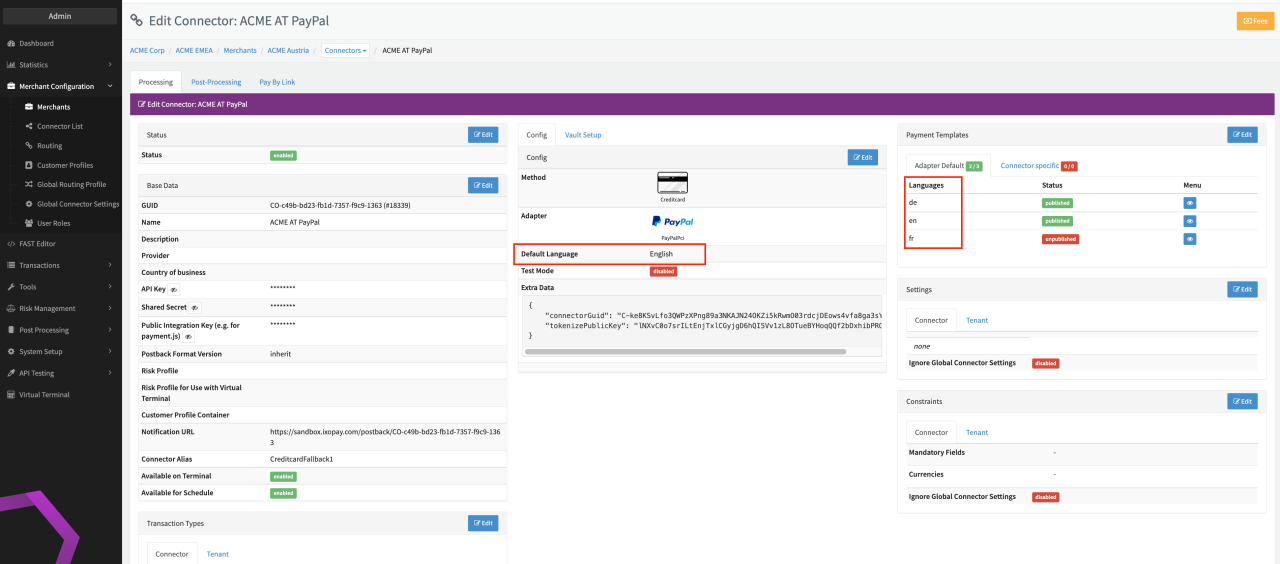 Language
Using the LAYOUT_NAME (= the custom payment template layout defined in the Connector Settings or created email template layout in the Pay by Link section), you can set up various templates based on different requirements for your Merchants (e.g. one default, one with inverse colors, one with requiring the address data of the consumer etc.)
If created in the Connector Detail Overview the correct Adapter*Key is generated by the Gateway automatically, including the correct path. Keep in mind that PCI adapter are created under the ADAPTER_KEY vault.
The payment template is resolved according to the following Rules:
In general it is recommended to create and adapt templates within the embedded (FAST) Editor screen with in the Connector Details Overview - Payment Templates Edit View in order to ensure the correct path and variables to be set by the gateway. Nevertheless you also have the option to use the Fast Editor section itself.
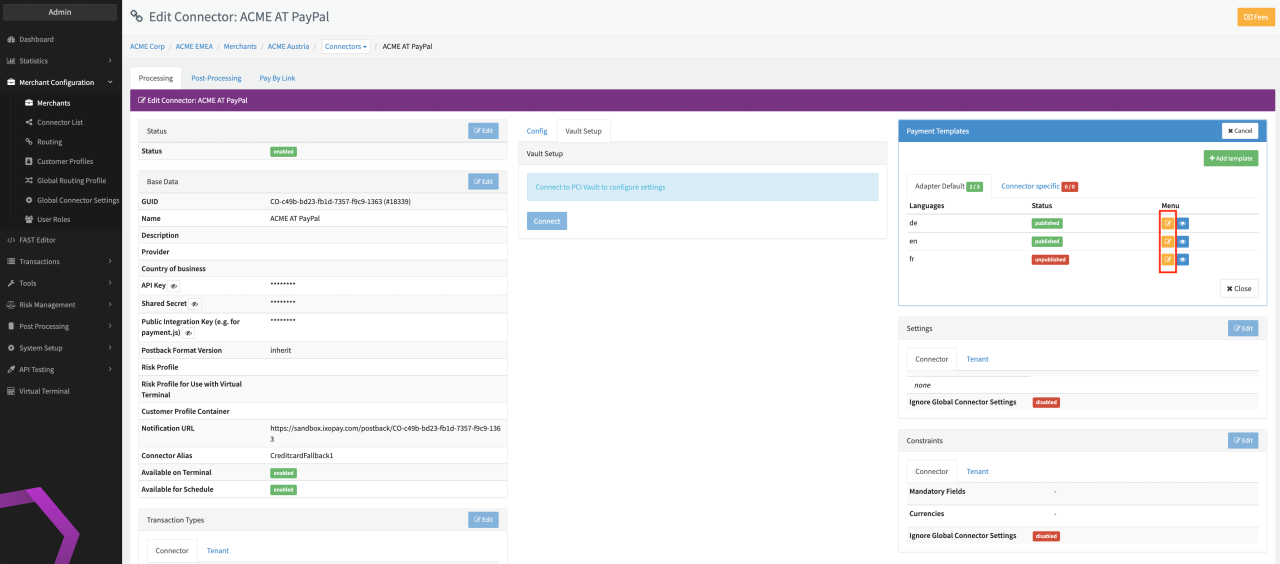 Connector Details Overview - Payment Templates Edit View
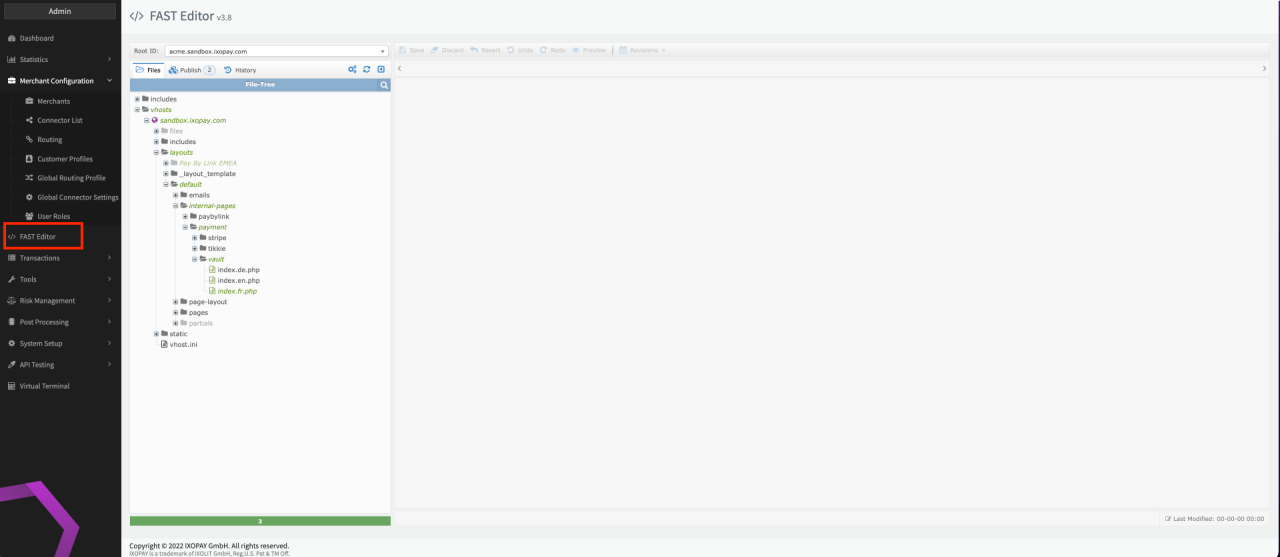 FAST Editor
Placeholders
Each Adapter provides different elements and data for rendering the payment form. These data are inserted in the template using placeholders. A placeholder is embedded by surrounding it with {{ and }} (e.g.: {{ fields.firstname.id }})
For ease of use, you may also use the placeholder helper on the right sidebar of the FAST Editor which should appear when you select a template page. Depending on the Adapter, different fields may be available. E.g. to insert the merchant name, simply click on “name ” under the merchant node. It will automatically place {{ data.merchant.name }} into the current cursor position in the Editor.
Some placeholders are generally available, others are available depending on the used adapter. Mandatory, as described below ones MUST always be used within each template:
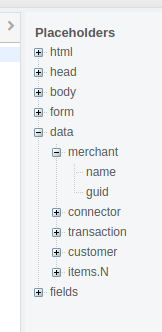 Placeholder Helper
Page layout inheritance
Every template has some common HTML content which is required independently from the used Adapter (such as HTML header, Javascript, form tags etc.). To simplify the actual payment templates, these elements can be defined in a so called page layout , which gets included automatically when rendering the payment template.
Page layouts can be defined under this path:
vhosts / [ hostname ] / layouts / default / page-layout
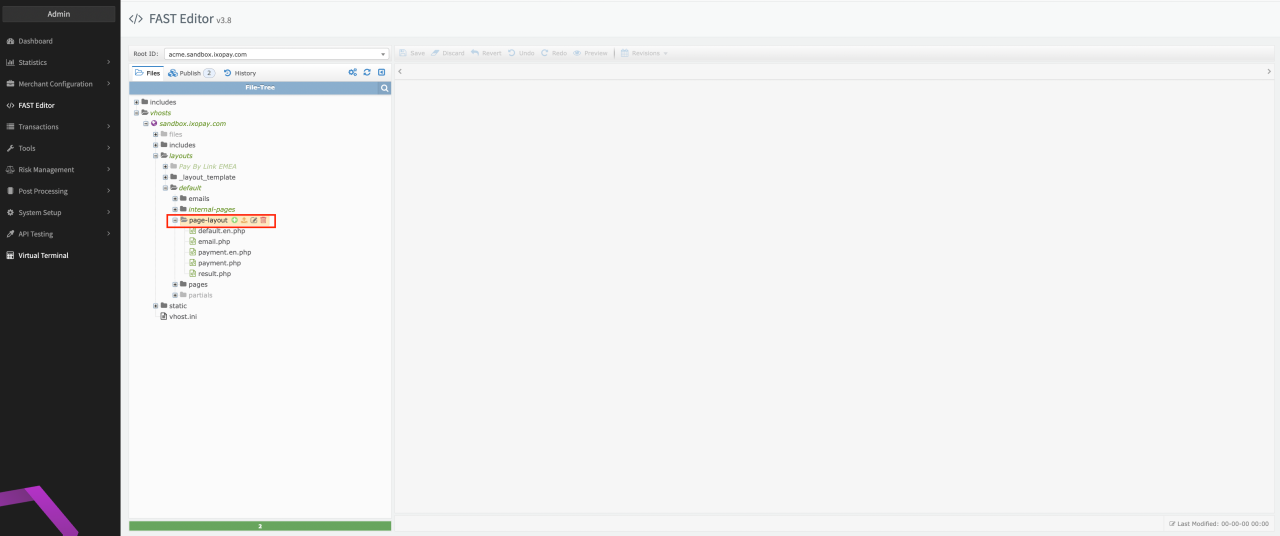 Page layout path
The page layout is resolved similar to the payment template according to the following Rules:
You can find predefined templates inside the _layout_template folder (see Page Layout Templates Path) — vhosts / [ hostname ] / layouts / _layout_template
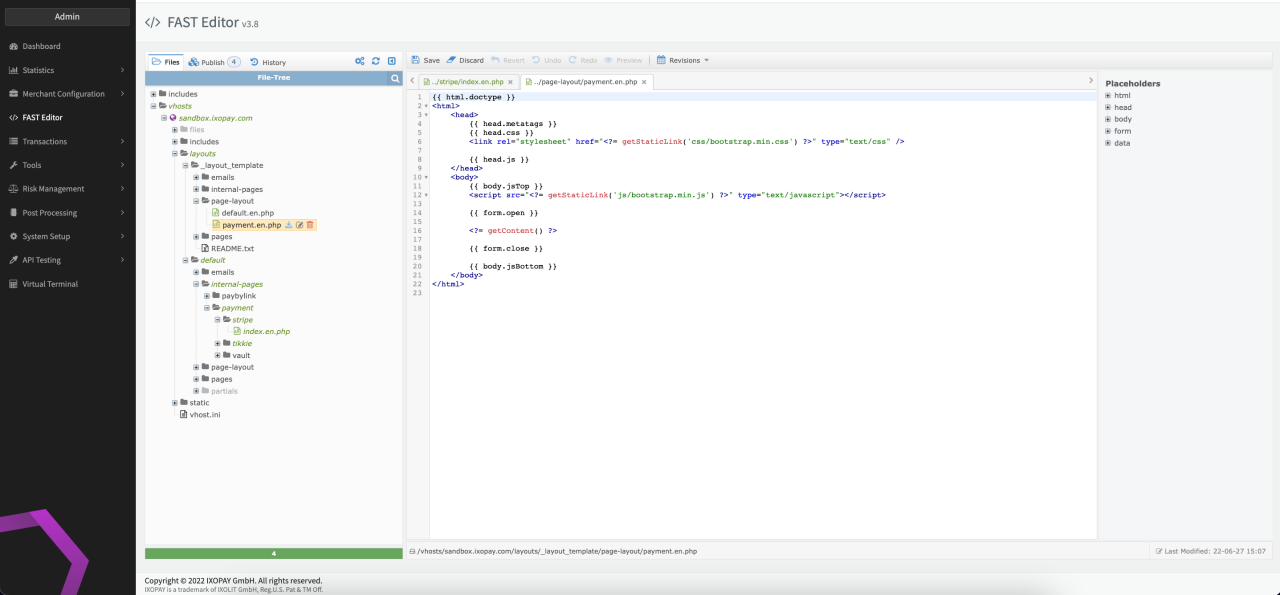 Page Layout Templates Path
Based on this logic it will first try to look for a page layout specific to the given language (e.g. payment.en.php), and if that doesn’t exist, it will eventually fallback to payment.php.
A typical page layout could look like this:
Form validation & Error handling
In many cases you may want to validate additional fields and display error messages. For this, the payment templates provide a Javascript API to influence the form submission.
For validation you have to define the Ixopay.onValidation method:
In case of errors, the Ixopay.onError method will be called, where it should display the error messages to the User:
PCI compliant fields
Fields which require additional compliance, such as Credit Card number and CVV code, are not included in the payment form directly, but provided by the external PCI compliant vault.
To embed them in the designated spot, you have to provide a DIV element with the appropriate ID (see API Documentation: payment.js).
However since you don’t have full HTML code control for these fields, you cannot apply CSS styles directly via style attribute or CSS class definitions. Instead you must use the Ixopay.PaymentFormV2.setCss method to apply those styles upon document ready event. You can also apply styles in the validation and error handler methods.
If needed, you can also include placeholders for PCI compliant fields:
Event listening
Events may be listened to via following functions:
Ixopay.PaymentFormV2.**numberOn**Ixopay.PaymentFormV2.**cvvOn**
Both, number and CVV fields support listening for the following events:
- input
- focus and blur
- mouseover and mouseout
- enter and esc
- tab and shift-tab
For all events, the callback function will receive a data object which will contain following:
- cardType (amex, diners, discover, jcb, maestro, mastercard, uatp, unionpay, visa, visa_electron)
- cvvLength (number)
- numberLength (number)
- validCvv (boolean)
- validNumber (boolean)
Static content
You may also insert images, css and js which you have uploaded to the FAST Editor. To make such elements accessible, navigate to the static folder where you will find a css , img and js folder. Simply upload your files into the appropriate folders or create your own folder structure (see Static Section).
vhosts / [ hostname ] / static
To link your uploaded element into your template use the getStaticLink tag which will automatically create a link to the specified file.
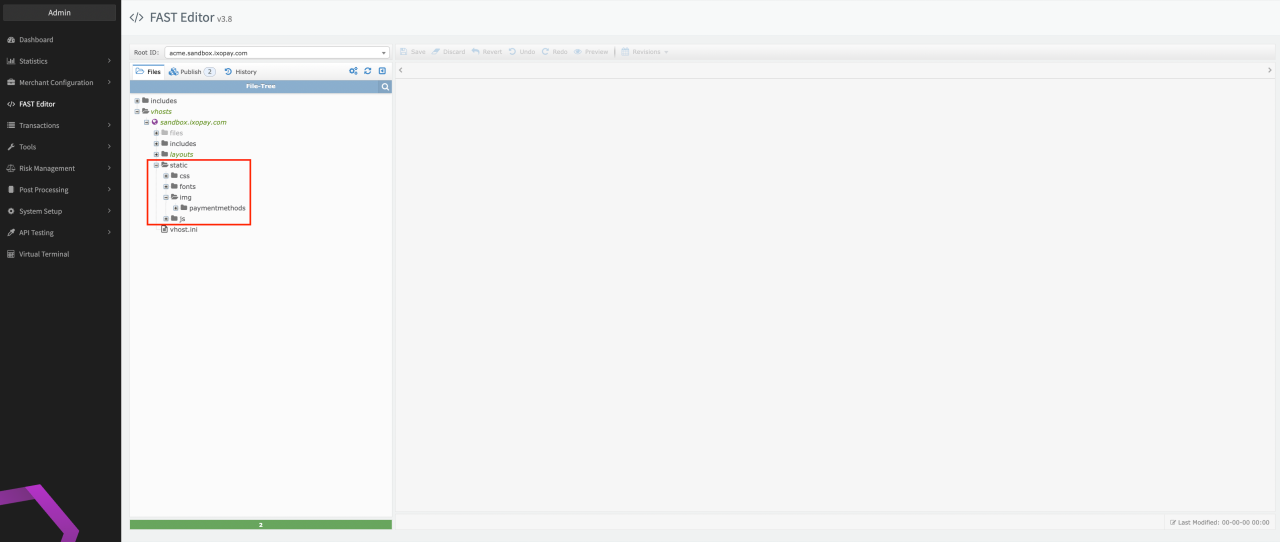 Static Section
> Example > > If you have uploaded a ‘info.png’ into the static/img/info.png you can embed it into your template as an image by doing > >
> >
> > The static directory itself is not part of the given URL. > >
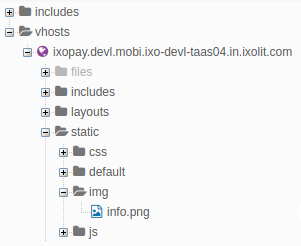 FAST Editor
Publish
Once finished, you need to publish your changes or created templates, before they can be used. This needs to be done in Publish Section of the Fast Editor (see Fast Editor Publish)
- Click on Publish Now
- Enter a Comment to document the changes applied (see Change Log)
- Click Publish
Now your templates will be shown as published in the Connectors Detail Overview - Payment Templates section.
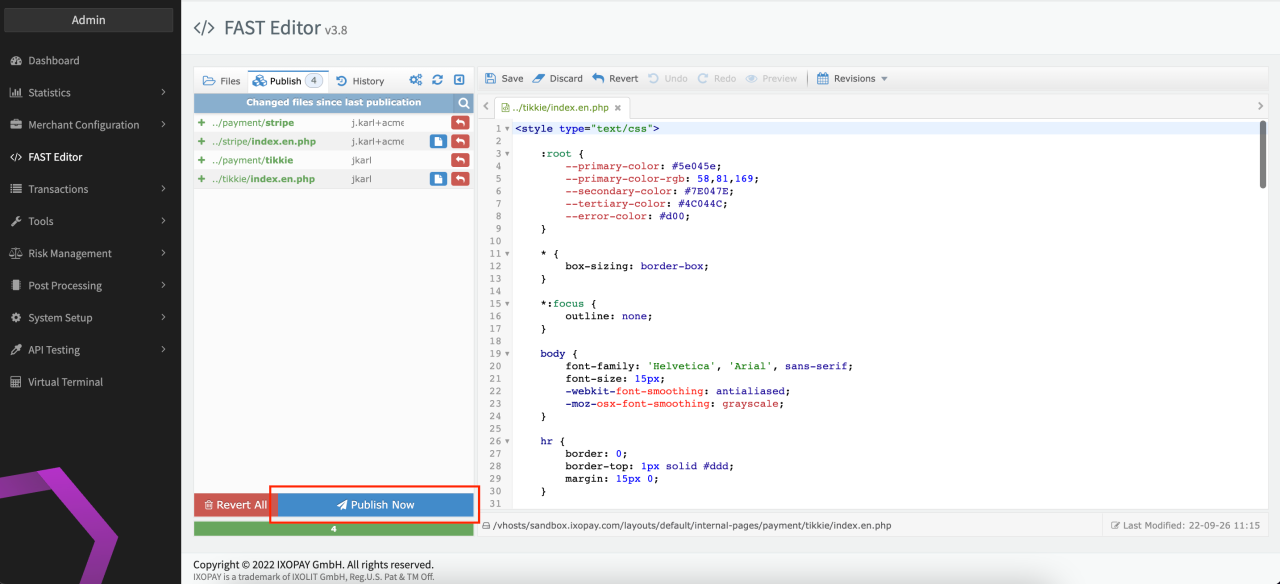 Fast Editor Publish
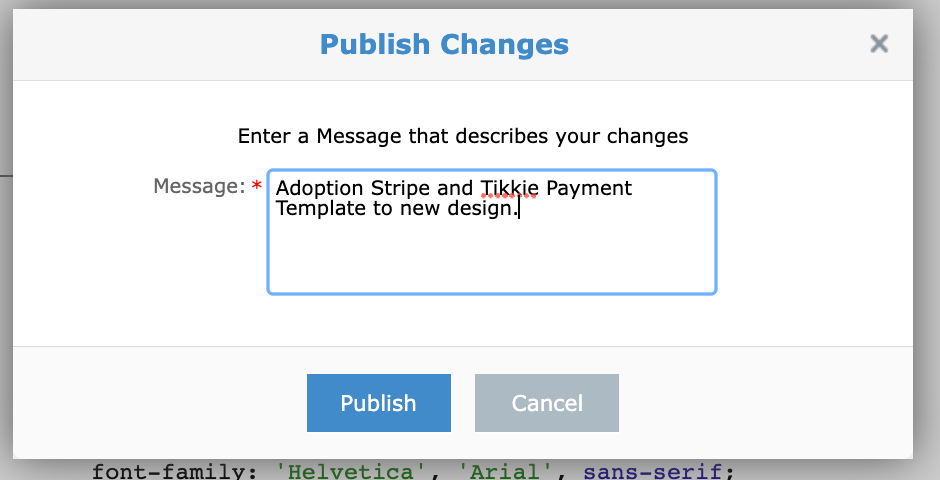 Change Log
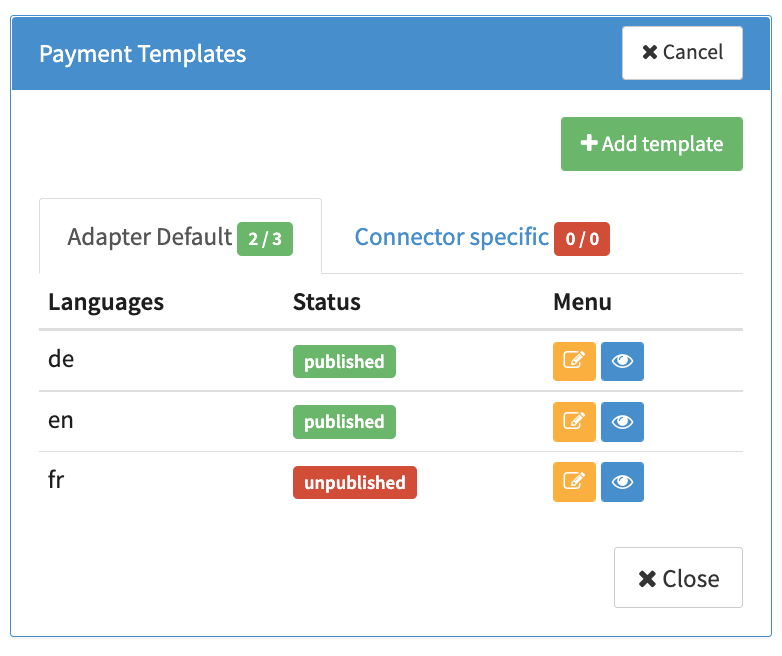 Connectors Detail Overview - Payment Templates
During the publish step all changes will be published performed on templates in the structure regardless of the editor. Same is true for reverting of changes: all changes done after the the change that you want to revert will be lost.