
Transaction API
After having set up your Connectors you have different options to run tests against the Transaction API. Either use the API Testing directly in the IXOPAY platform or see our
Transaction API documentation for further information.
To use the API Testing in the IXOPAY platform, follow these steps:
- Navigate to the API Testing section, sub-section Transaction API
- Select a Connector from the list (API Key and Shared Secret will be filled automatically) or
- Fill in the API Key and Shared Secret (see Create and Assign Connectors & Adapters section)
- Select User in the dropdown list
- Select if you want to use
- Transaction API client
- Transaction API JSON
The Target URL is pre-filled with the URL to the appropriate IXOPAY platform instance and usually does not require any further adjustments. No matter how you test your set up, please keep the following notes in mind:
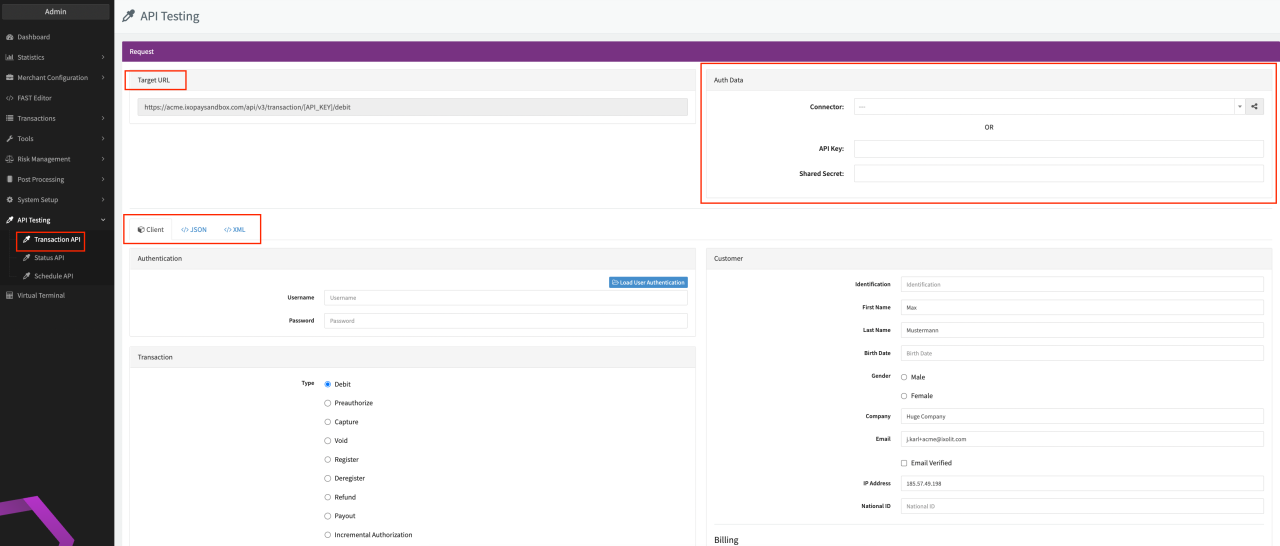 API Testing - Transaction API
Before you start your tests, please consider that Transactions performed on Connectors which do not have the Test mode enabled, will be considered as Live Transactions and therefore appear in any reports and statistics.
Be aware that for transactions performed on Connectors with Test mode enabled as well as transactions performed with Connectors SimulatorPci, Simulator or Dummy with Test mode disable do have a rate limit of 5 transactions per 60 seconds.
Transaction API client
The IXOPAY platform Transaction API client tab will be selected by default, with that you can execute tests using different values for the enabled features.
Fill in the necessary parameters for the testing in the Client Form:
- Transaction
- Customer
- 3D-Secure data
- DCC
- Level 2/3 Data
- Schedule - Data
- Items
Once you are ready and want to see the requests about to be sent without submitting, click Show JSON (see Show JSON). To initiate the Transaction click Submit. The Transaction will be shown immediately in the Transaction List
The Result Box will display the response containing information about the Transaction (e.g. current state). Depending on your entered information the transaction can be successful, result in errors due to missing fields or invalid data, or redirected.
In case a redirect is required, you can click Open Redirect URL in new Tab or Open Redirect URL in iFrame in the Transaction API client. Open Redirect URL in iFrame will load the URL in the Redirect iFrame Box next to the result box (see Result and Redirect iFrame Box).
Click Go to Transaction to follow the link to the Transaction Details.
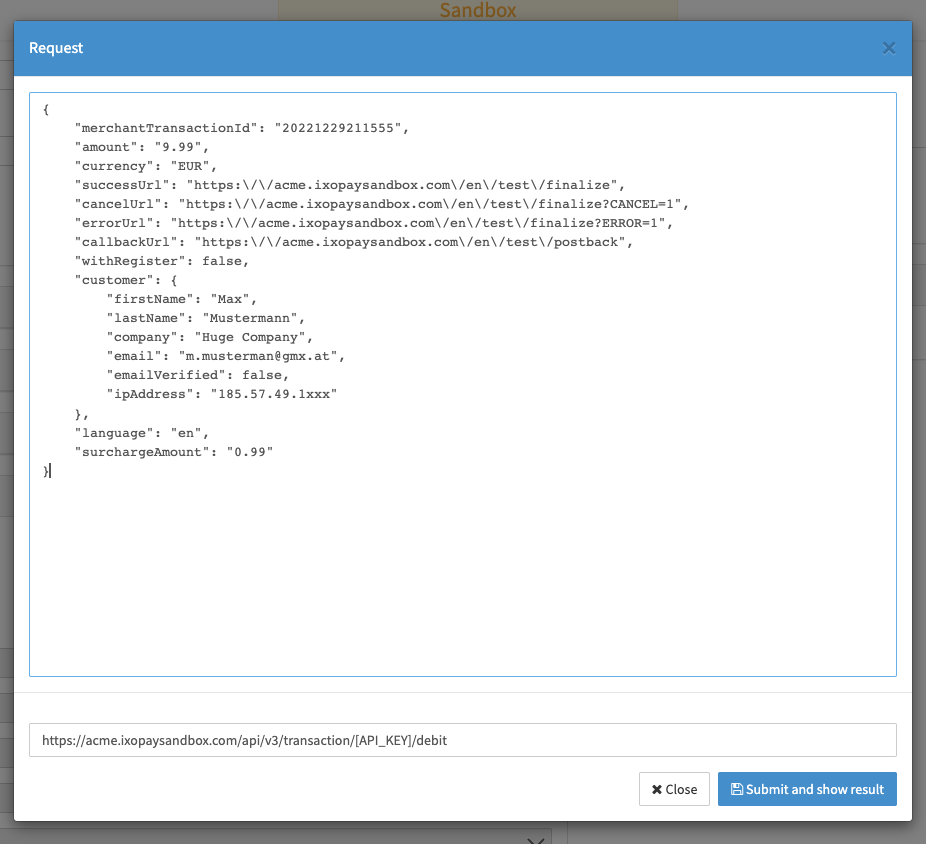 Show JSON
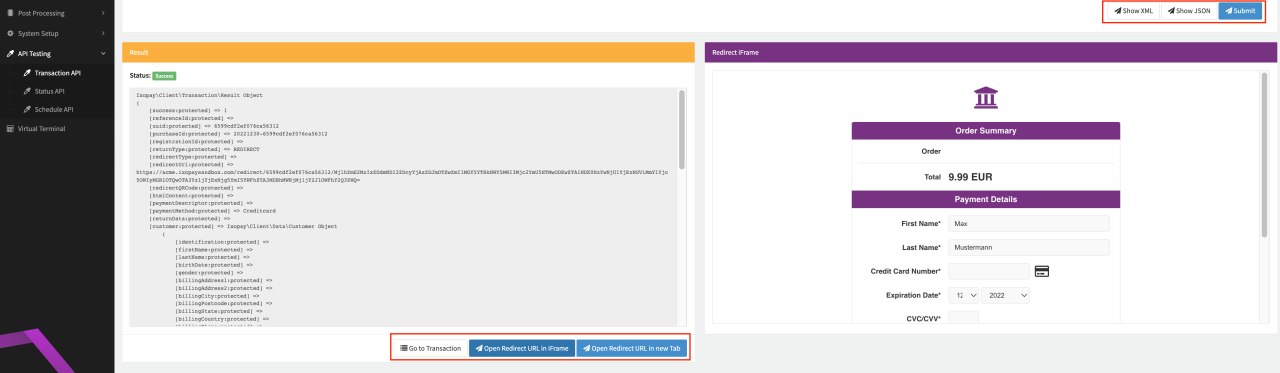 Result and Redirect iFrame Box
Transaction
In this section you can configure Transaction Details (see Transaction Table).
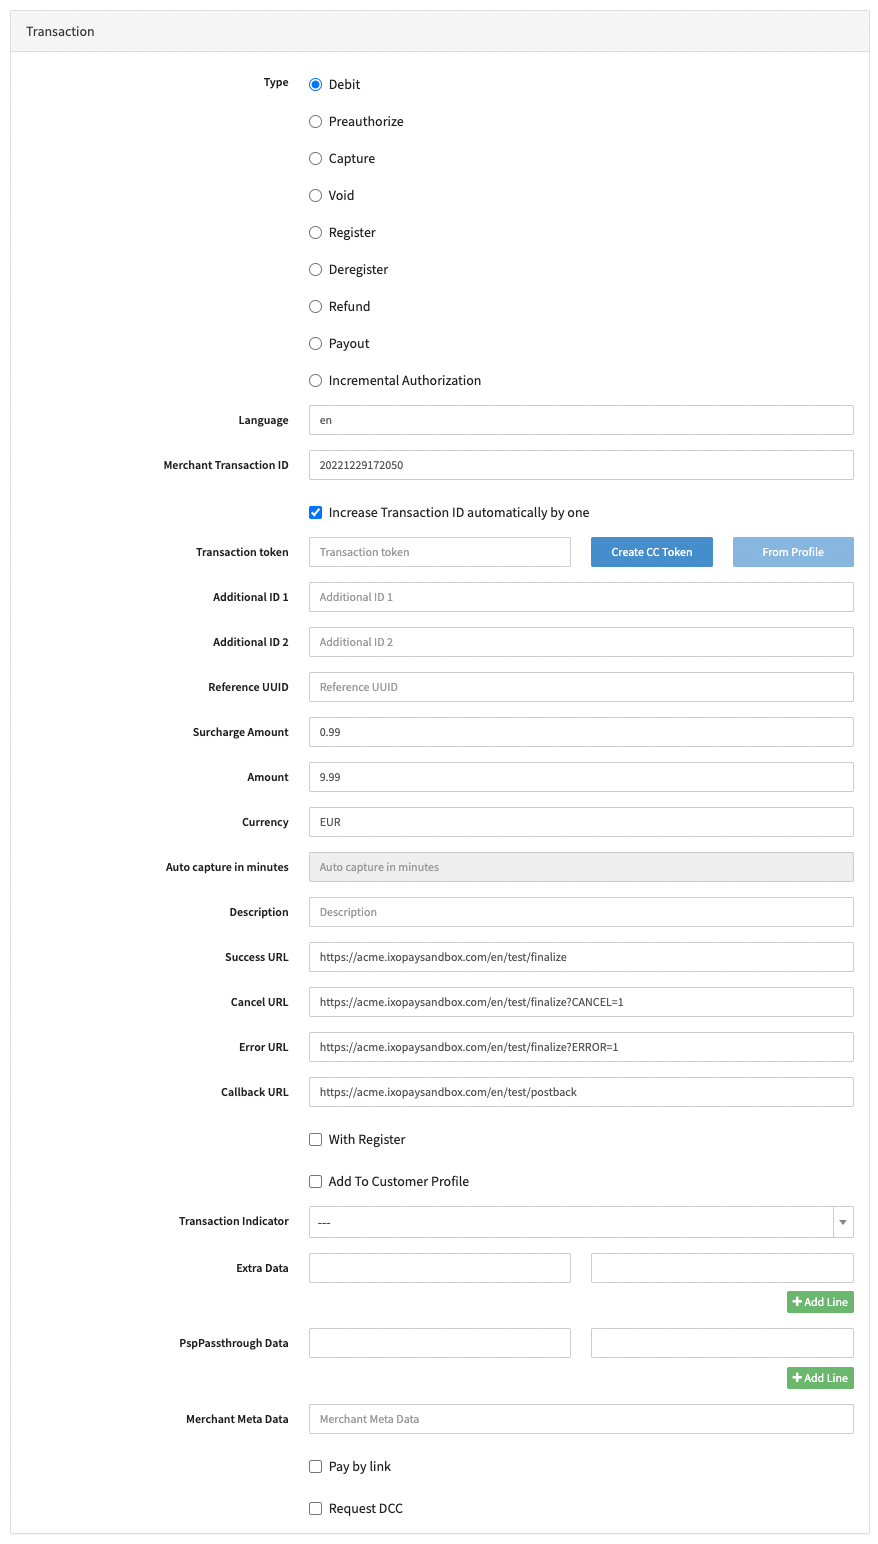 Transaction Details
In case the button Create CC Token is greyed out, ensure that the Connector used has set a Public Integration Key see Create and Assign Connectors & Adapters section)
Customer
In this section you can fill in Customer Details (see Customer Details, Customer Billing Data, Customer Shipping Data and Additional Data).
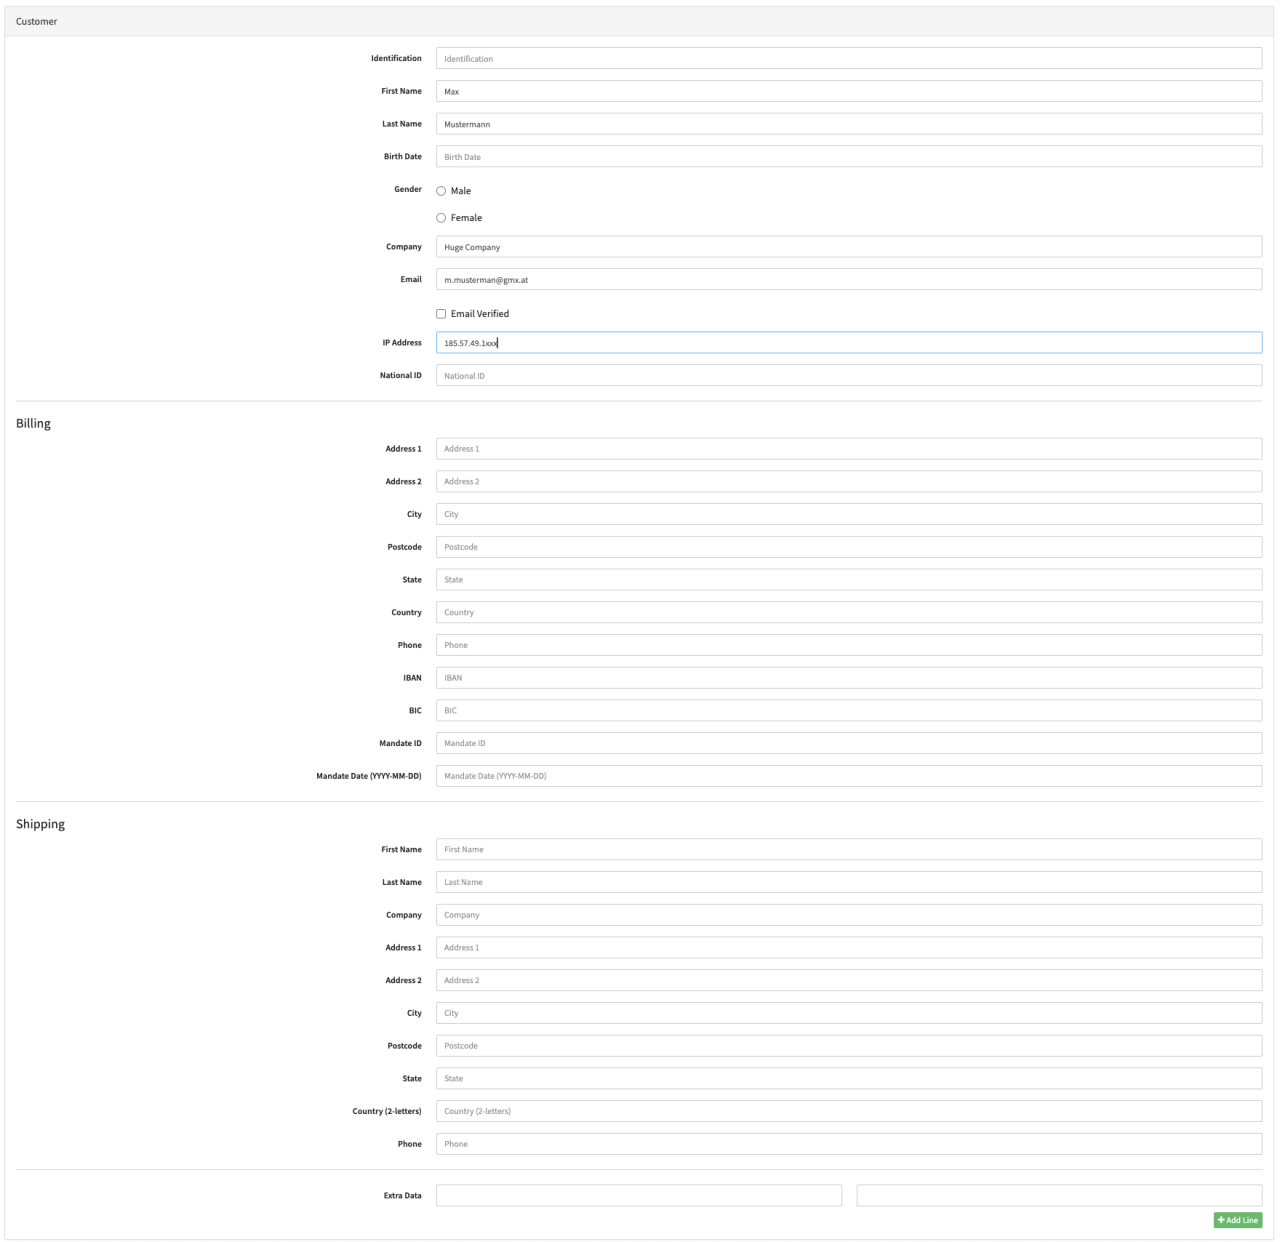 Customer
Customer Details
Customer Billing Data
Customer Shipping Data
Additional Data
3-D Secure
In this section you can fill in additional 3-D Secure data (see 3-D Secure Data).
 3-D Secure
3-D Secure Data
DCC
In this section you can fill in additional DCC data (see DCC Data).
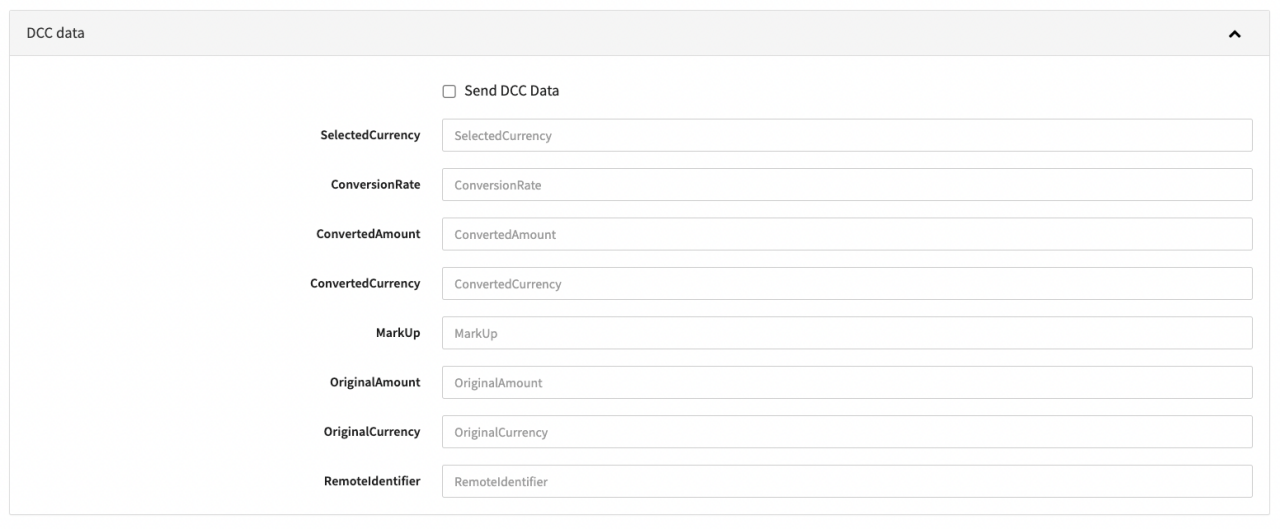 DCC data
This section is only relevant if Dynamic Currency Conversion is supported for the Connector used for Testing.
DCC Data
Level 2/3
In this section you can fill in additional Level 2/3 data (see Level 2/3 Data and Tax Details).
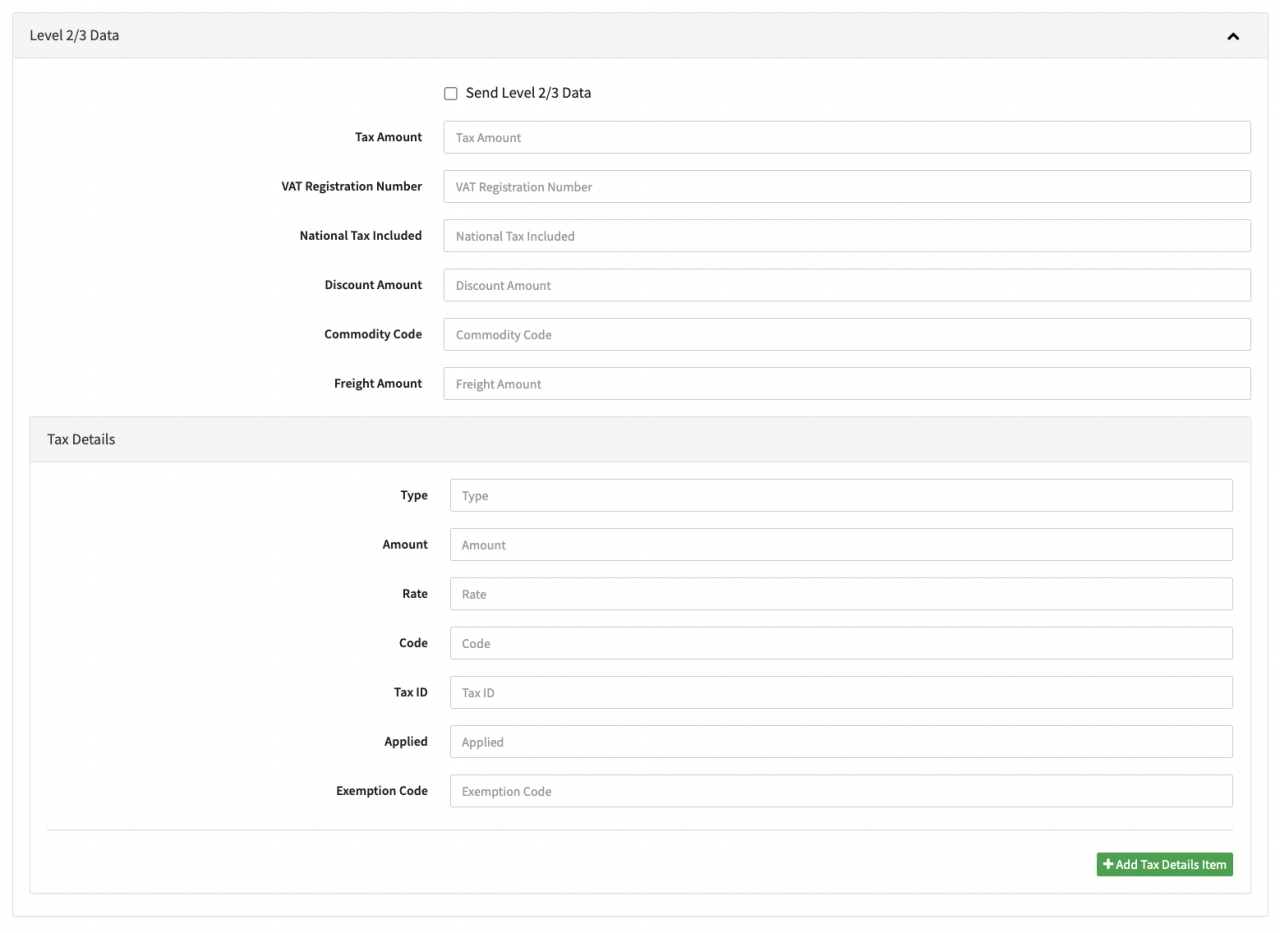 Level 2/3 Data & Tax Details
This section is only relevant if Level 2/3 data is supported for the Connector used for Testing.
Level 2/3 Data
Tax Details
Schedule
In this section you can fill in additional Schedule — data (see Schedule Data and also Create a Schedule section).
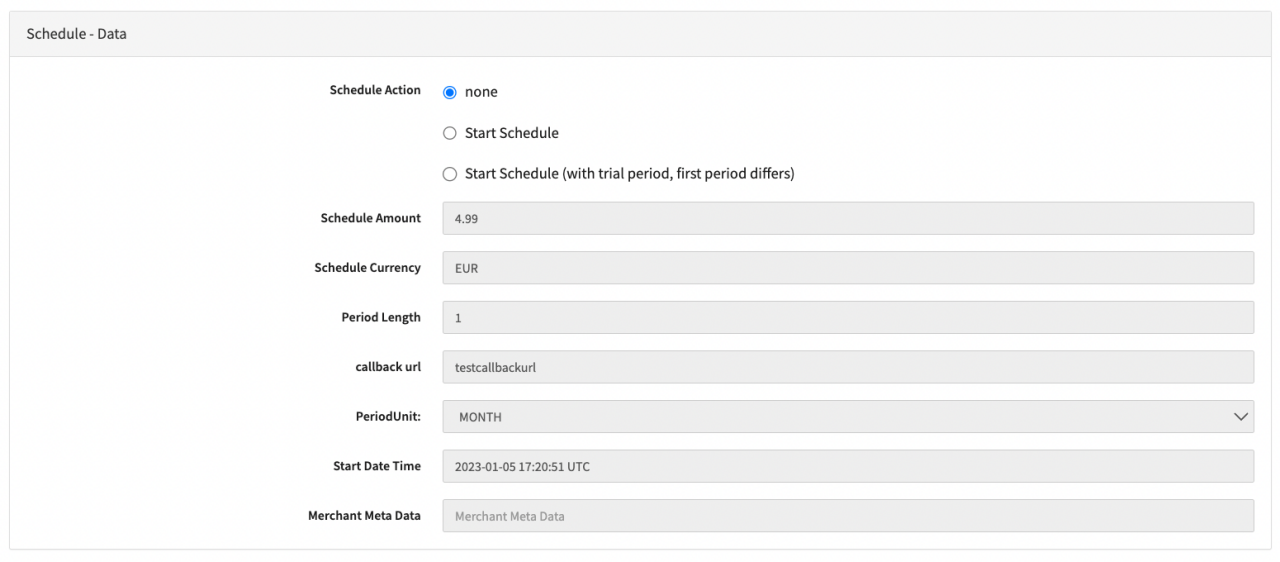 Schedule Data
Schedule Data
Items
In this section you can fill in additional Items data (see Item Data, Tax Details).
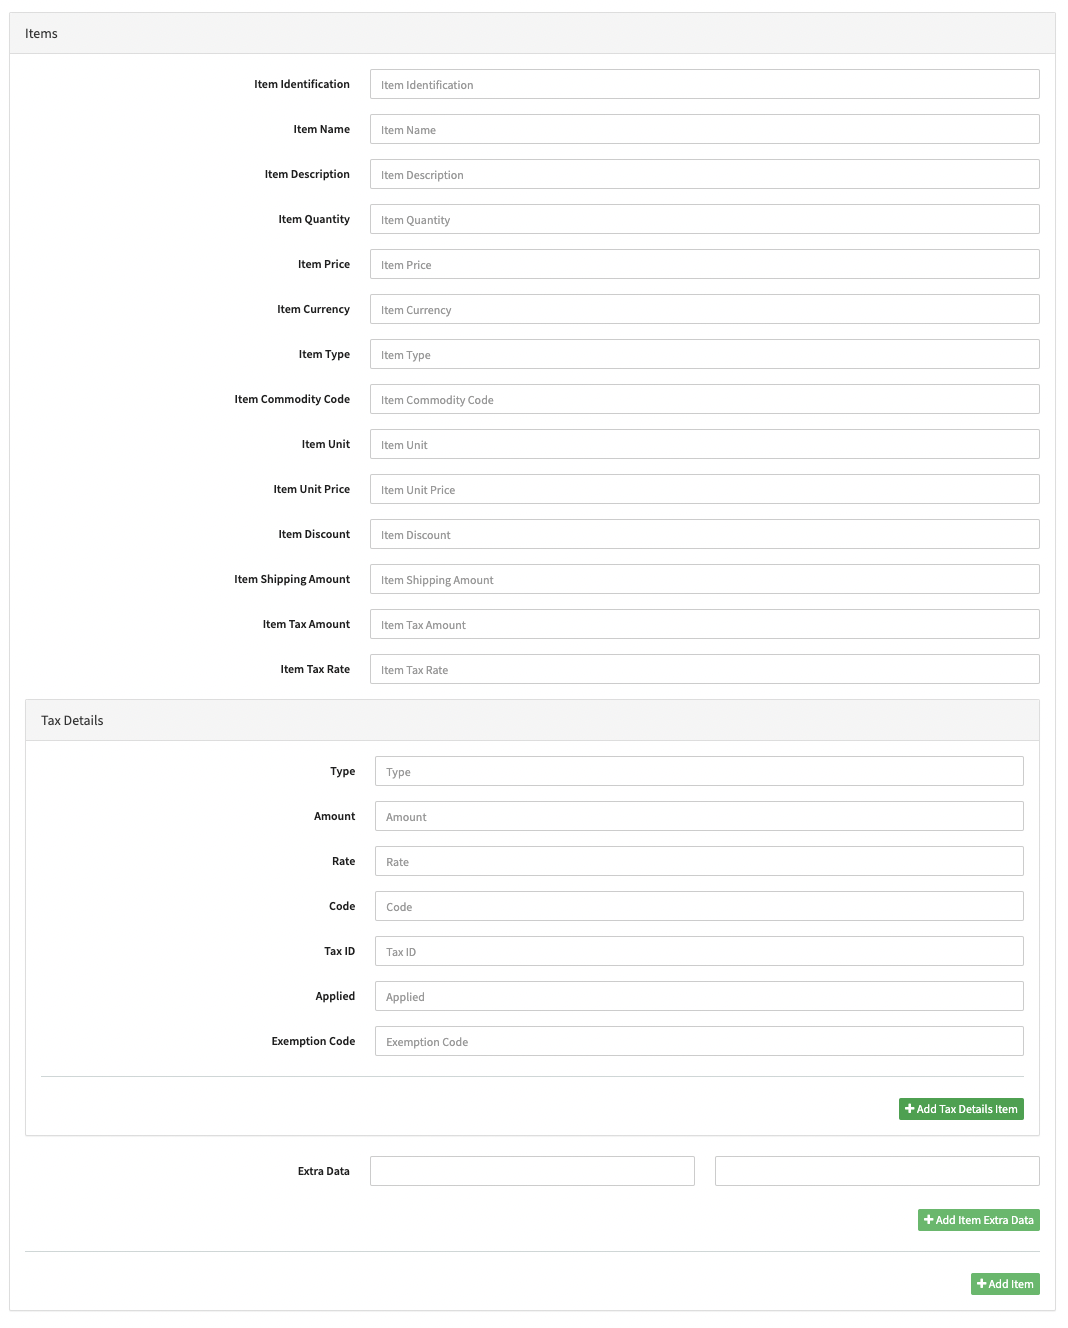 Items
Items
Item Data
Tax Details
Transaction API JSON
Instead of using the Transaction API client, you may also use the Transaction API JSON.
- Select the transaction type from the list
- Click Load JSON Example to see the example request (using prefilled parameters)
To initiate the Transaction click Submit.
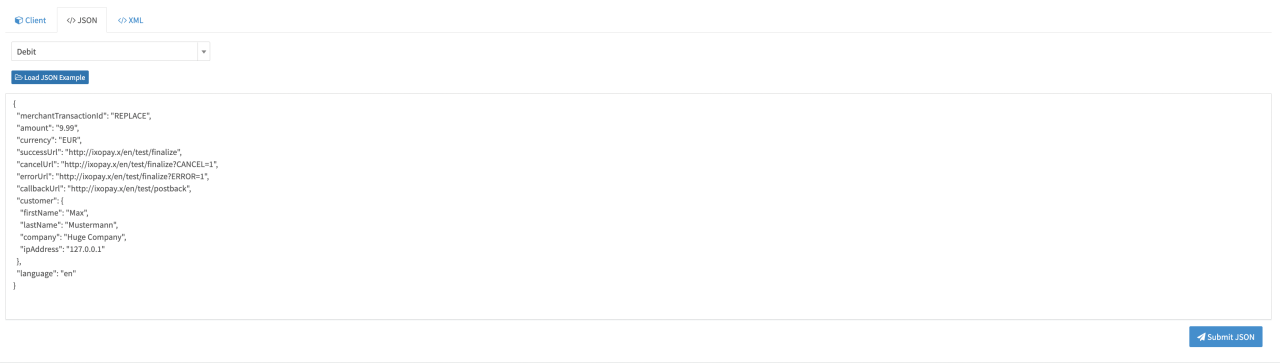 JSON
JSON
Transaction API XML
API V2 (XML) is a Legacy Version. New features and functionality will only be available using API V3 (JSON)