
Customer Profiles
If you want to get access to all IXOPAY platform features you need to upgrade your plan. Please contact our Support Team in the IXOPAY Customer Experience Portal for more information.
Customer Profiles allow you to store and organize customer data and related payment instruments to create a smooth shopping experience. You access Customer Profiles through either the platform or using the Customer Profile API directly.
Customer Profile Containers
Customer Profiles are organized in so called Customer Profile Containers. Depending on your business model, contractual / legal setup or other requirements, it might make sense to create several containers to separate and categorize your customers. To create and edit Customer Profile Containers:
- Navigate to the Tokenization > Customer Profiles section.
- Select the (Sub-)Tenant you want to create or edit a Customer Profile Container for.
- Click + New Container.
- Enter a Container Name.
- Enable the option Shared with Subtenants if you want to share Customer Profiles among different Sub-Tenants (see New Container).
- By default, Customer Profile Containers are enabled. Enable the option Disabled to disable Customer Profile Containers.
- Click + Create.
The Container will appear in the Customer Profile Container Overview and can be edited at any time by clicking edit. You can also access the Customer Profiles stored in the Container by clicking show (see Customer Profiles).
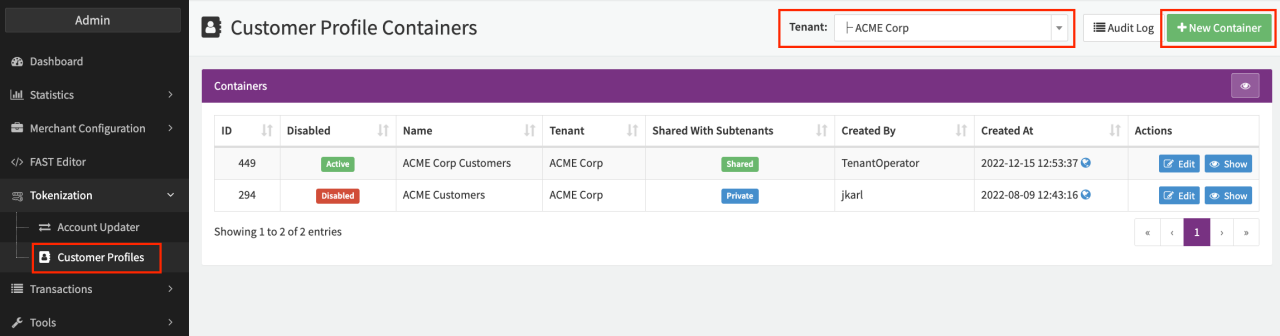 Customer Profile Container
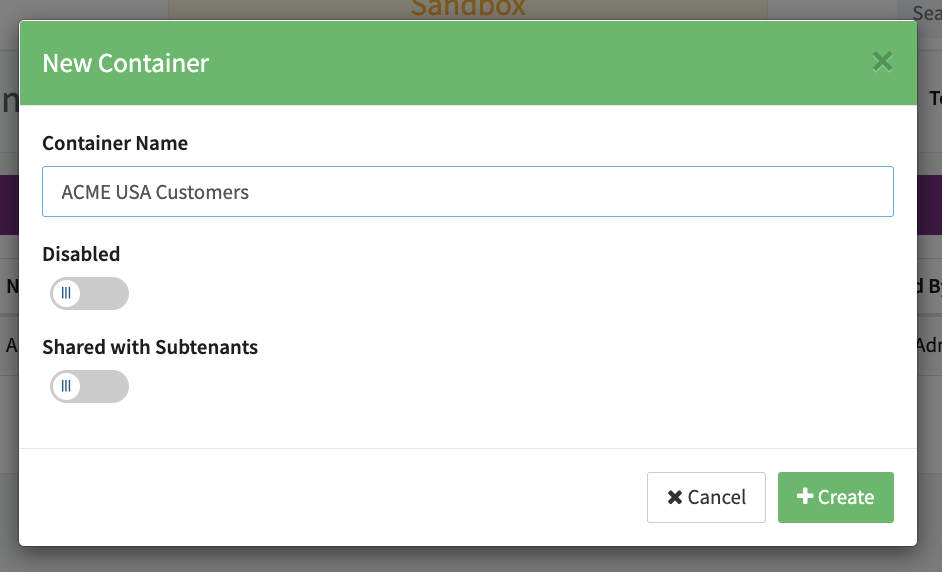 New Container
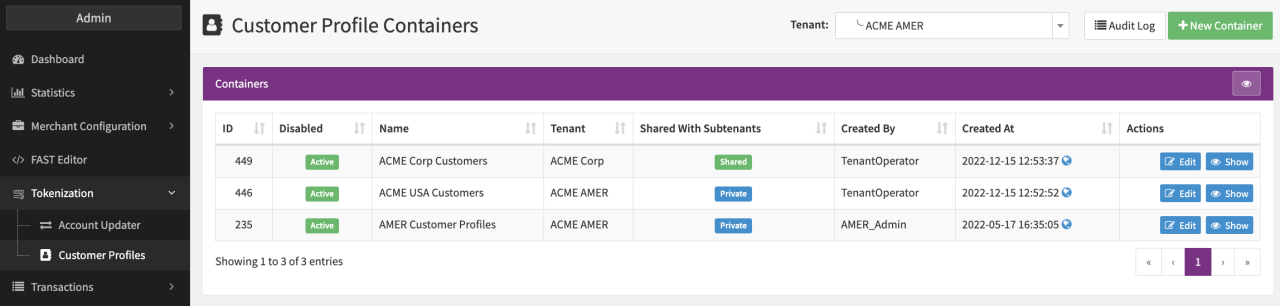 Customer Profile Container Overview
Assign Customer Profile Container
In order to store customer profiles in a container, you need to assign the Customer Profile Container to a Connector. Any successful Register Transaction or Debit / Preauthorize Transaction with the withRegister flag set to true processed by this Connector will automatically add the customer data and used payment instrument for subsequent charges as a Customer Profile in this container if a customerIdentification is provided (see also Creating a customer profile).
You can assign a Customer Profile Container either in the Connector Base Data (see Connector Details Overview) or using Global Settings.
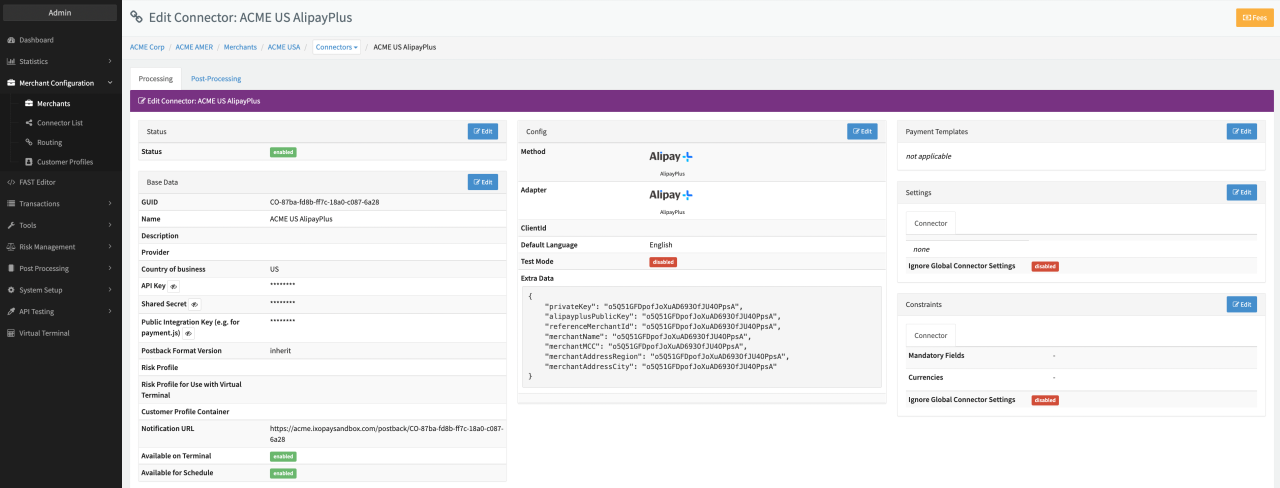 Connector Details Overview
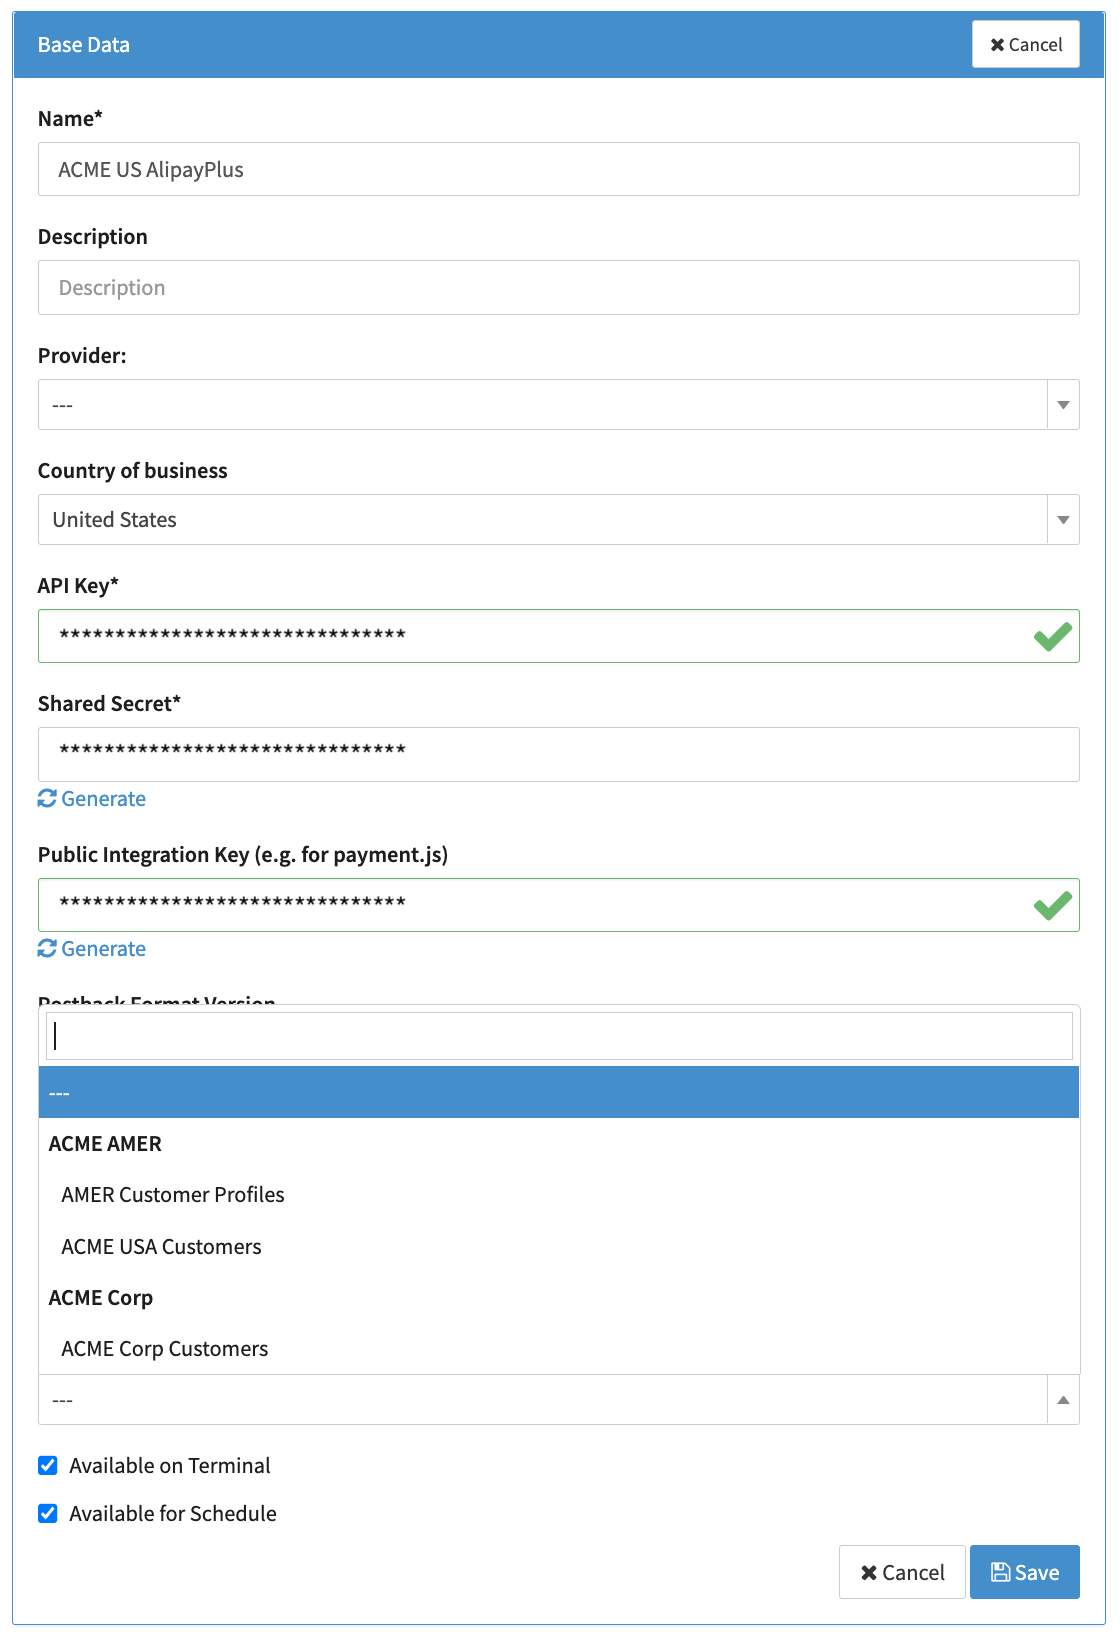 Connector Base Data
If your setup uses Multi-Method Connectors make sure you also assign the Customer Profile Container there.
Viewing Customer Profiles
To access the individual profiles stored in a container, navigate to the Customer Profile Container Overview and click Show for the individual container.
You will be presented with an overview of all Customer Profiles (Profile List) in this container including options to filter by Profile Data or Customer Data. Click Show for the individual profile to see more details (stored payment instruments, transaction history, customer data etc.).
Customer Profile Container Overview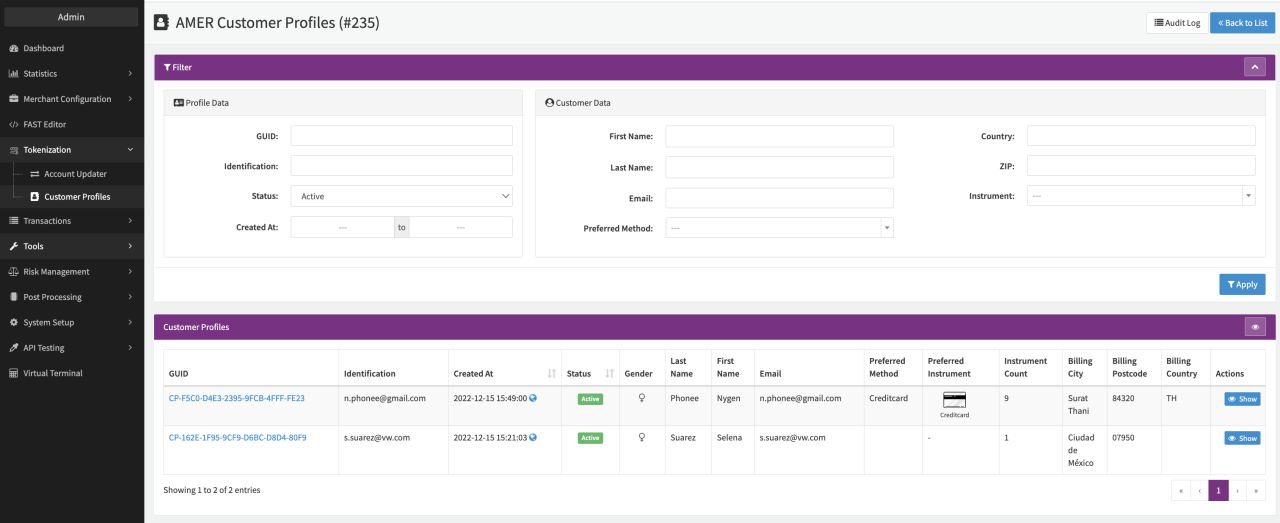 Overview of all Customer Profiles
Customer Profile Details
Each Customer Profile contains different tabs containing details about
- Profile Data
- Payment Instruments
- Profile Transactions
There are also Action Buttons used to navigate back to the Profile List, Edit Profile (Data) or Delete Profile.
Profile Data
This tab contains base data about the Profile such as Customer data (e.g. personal data, billing data), the Connector used to create the Customer Profile, Customer Profile GUID , and Customer Identification , as well as the Preferred method (see also Payment Instruments). The section Extra Data can be used to store any additional data.
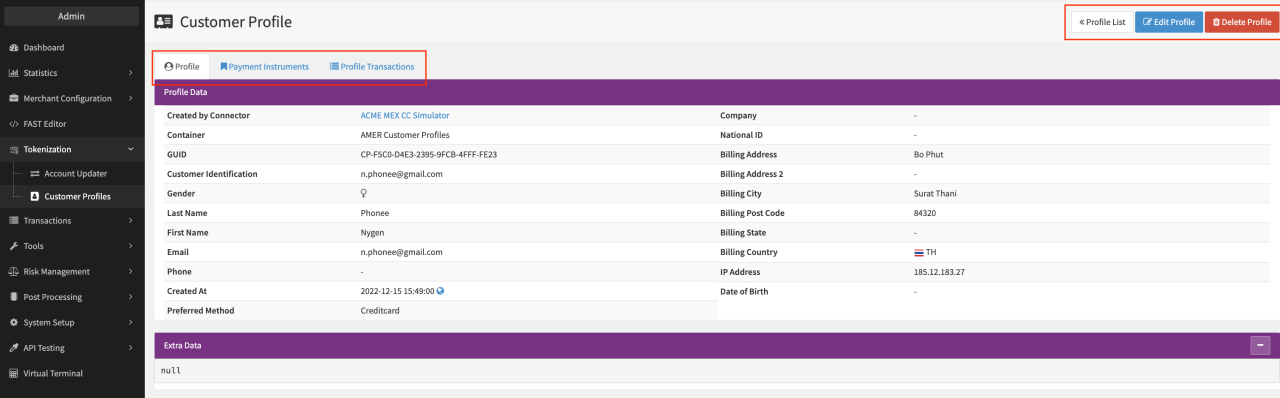 Customer Profile
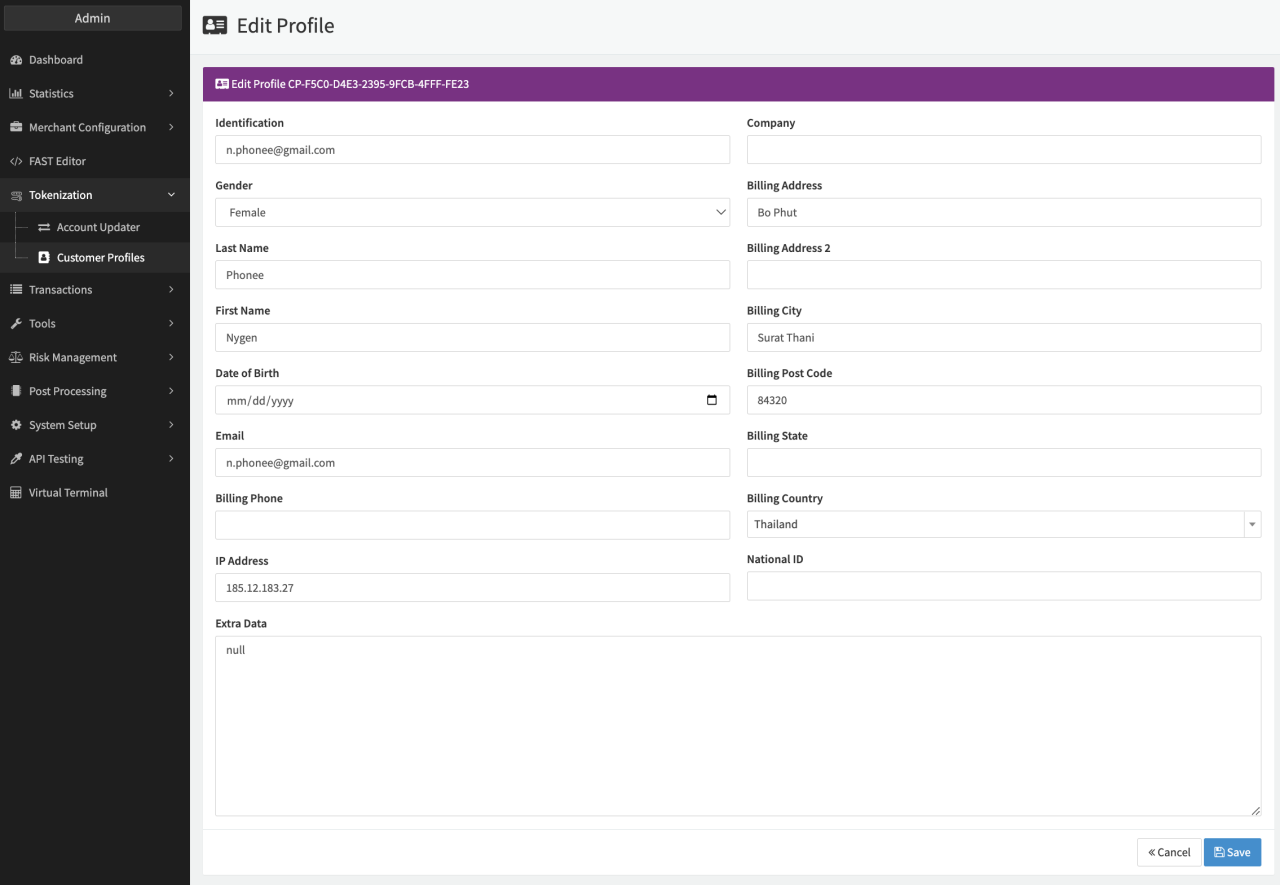 Edit Customer Profile
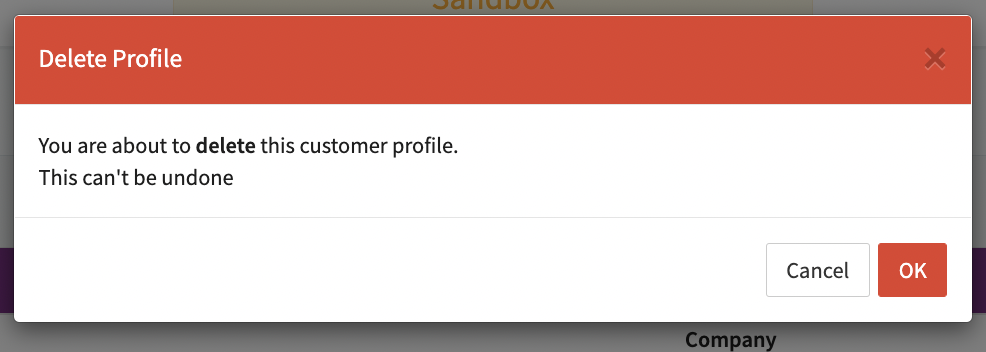 Delete Customer Profile
To add additional data to the customer profile, either the Customer Profile GUID or Customer Identification must be provided.
Payment Instruments
This tab contains all payment instruments stored by the customer, categorized into one of the following categories:
- Credit Cards (including ApplePay & GooglePay)
- IBAN
- Others — any payment instrument not falling into a previous category
There are also Action Buttons for each payment instrument (see Customer Payment Instruments):
- Set Preferred — each customer can have one preferred payment instrument which will be marked as preferred for usage later on (e.g. to design hosted payment page for Multi-Method Connectors).
- Detach — to detach the payment instrument from the Customer Profile (payment instrument will still be stored — additional costs may apply).
- Deregister & Detach — to detach the payment instrument form the Customer Profile and deregister the payment instrument all together.
- Transaction — link to the Transaction Details creating the stored payment instrument element in the Customer Profile.
Depending on the category, you will see different information for each payment instrument (e.g. Account Updater Status, IBAN, BIC, Mandate ID, First 6 / Last 4 Digits, Expiry Date). For each payment instrument, the Payment Token is shown and can be used as the transactionToken to initiate subsequent transactions (see Customer Profile API).
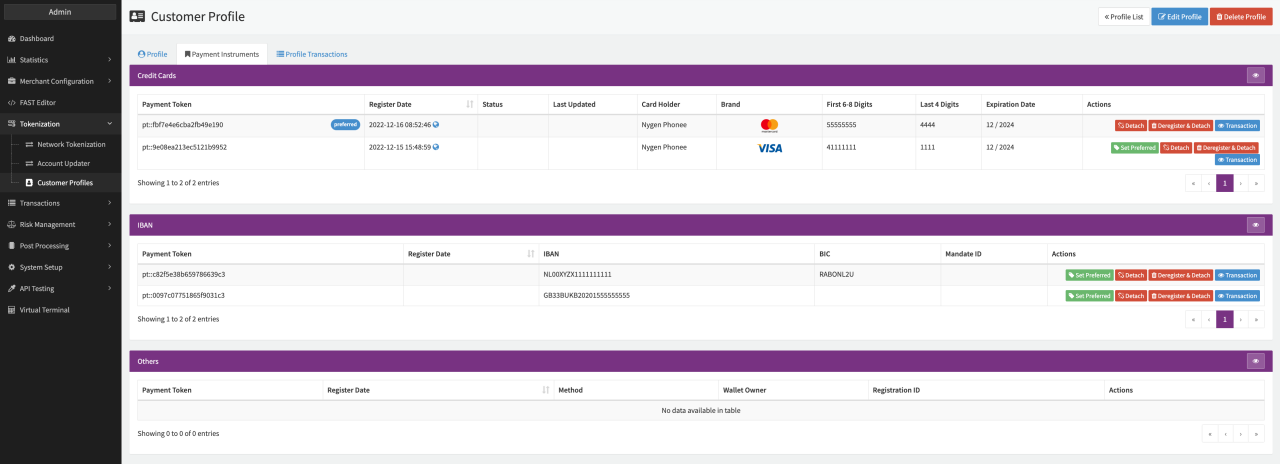 Customer Payment Instruments
Setting a payment instrument as preferred can be done in the Transaction creating the stored payment instrument element in the Customer Profile (handled using the markAsPreferred flag in the CustomerProfileData object in the transaction request, see Customer Profile API) or using the Action Button Set Preferred in the Customer Profile itself. The current preferred payment instrument is labeled as preferred.
Setting up the Hosted Payment Page with Customer Profiles
Please refer to the Multi-Method Connector and Payment Selection Template sections for details on how to create a Multi-Method Connector and to set up of Payment Selection (hosted payment) pages.
If the customerIdentification or customerGUID parameter is sent within the request to a Multi-Method Connector, the following parameters are available for use within template (see Fast Editor and Payment Selection Template):
- UserPreferredPaymentInstrument — containing the Payment Token value of the preferred instrument (e.g.
pt::b639e636df17af782602) - withRegister — true or false
- customerProfileEnabled – true or false
- paymentMethods – associative array containing all stored payment instruments grouped by the payment method starting with the preferred method (if set)
The basic structure of each payment method contains general information about the payment method:
selected => true is only set for the payment method set as Remember.
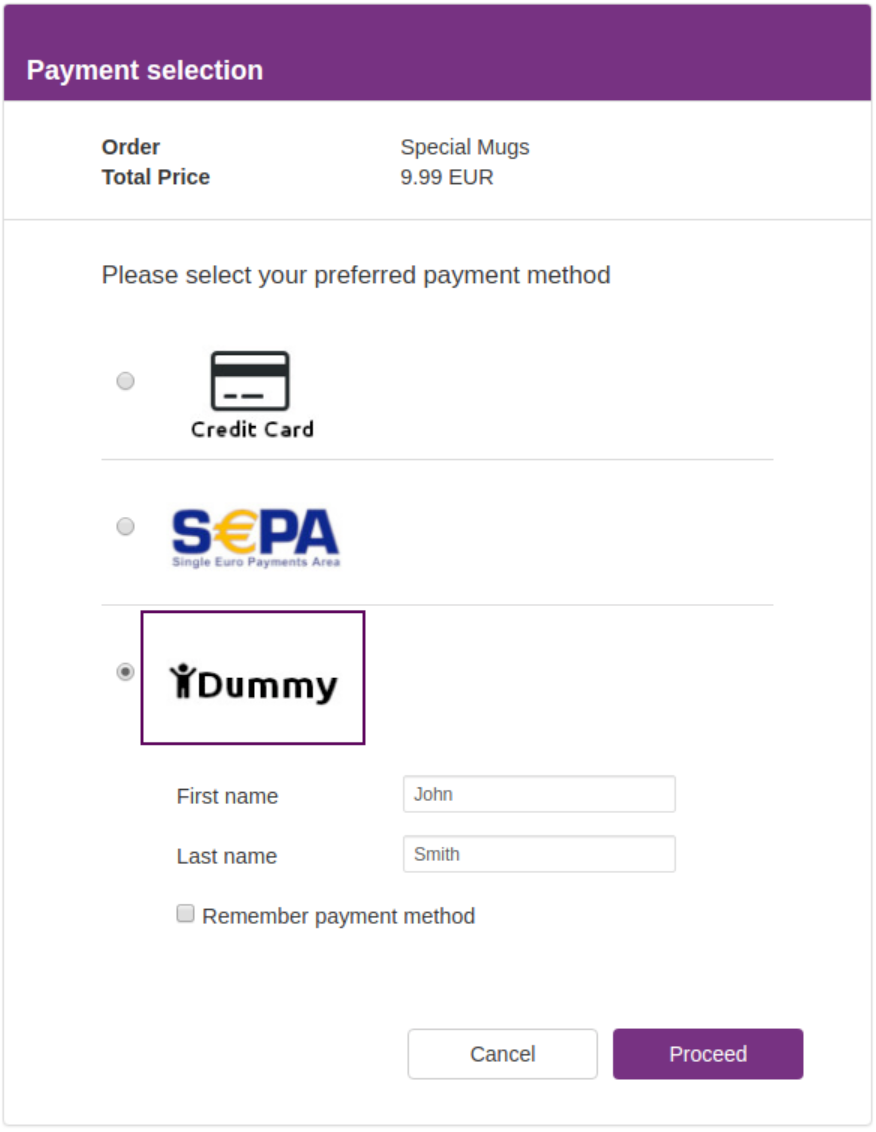 Remember payment method
Credit Card
To ensure that sensitive details like credit card numbers and bank account numbers are not handled by merchants directly, the IXOPAY platform’s payments.js library renders separate iFrames for details such as the credit card number and CVV. Data entered in these fields is then sent to the IXOPAY platform vault directly, where it is tokenized. (see API documentation)
IBAN
Any other payment method
Flags
Within the transaction request, you can then set the following flags:
- doRegister — to store the payment instrument
- rememberMethod — to save the selected payment method as “last used payment method”
- setAsPreferredInstrument — to store and set the payment instrument as preferred as well as save the payment method as “last used payment method”
Examples
Example template
For the template rendering of payment methods you can either loop through paymentMethods or create an appropriate handling for each paymentMethod.
Customer Profile data can be requested before transaction processing using the Get profile request against the Customer Profile API (e.g. to be included in the checkout page for customer confirmation). Merchants then must include this customer data in the actual transaction processing using the Payment Token, since profile data is not copied to subsequent transactions.