
Provider
If you want to get access to all IXOPAY platform features you need to upgrade your plan. Please contact our Support Team in the IXOPAY Customer Experience Portal for more information.
So called Provider are an entity created in the IXOPAY platform (usually representing a Payment Service Provider) to perform accumulated Post Processing actions, calculations and data exchange like Provider Reconciliation and Provider Settlements across Sub-Tenants and Merchants. Providers are therefore created on (Sub-)Tenant level. We recommend to create a separate Provider for each contractual relationship.
Create a new Provider
Create a new Provider for your setup:
- Navigate to the Post Processing section, sub-section Providers
- In the Provider Overview select the (Sub-Tenant) and click + New Provider
- Fill in the Provider Base Data (see Create Provider)
- Fill in the mandatory Name
- Select the mandatory (Sub-)Tenant for the Provider
- Select the optional Adapter (see also Edit Provider section)
- Fill in the optional External ID
- Select the optional Set Pending Outgoing Settlement To - Notice Received, Funds Received
- Select the mandatory Timezone
- Select the mandatory Country
- Add optional External Account Numbers (Currency and Number pair) with + Add
- Add optional Rolling Reserve (Method, Percentage, Days) triplets with + Add
- Create the new Provider with + Create Provider
The new Provider will appear in the Provider Overview for the selected (Sub-)Tenant with options to show the Provider Details Overview (click Overview), edit the Provider, assign Connectors or Schedule Post Processing Jobs.
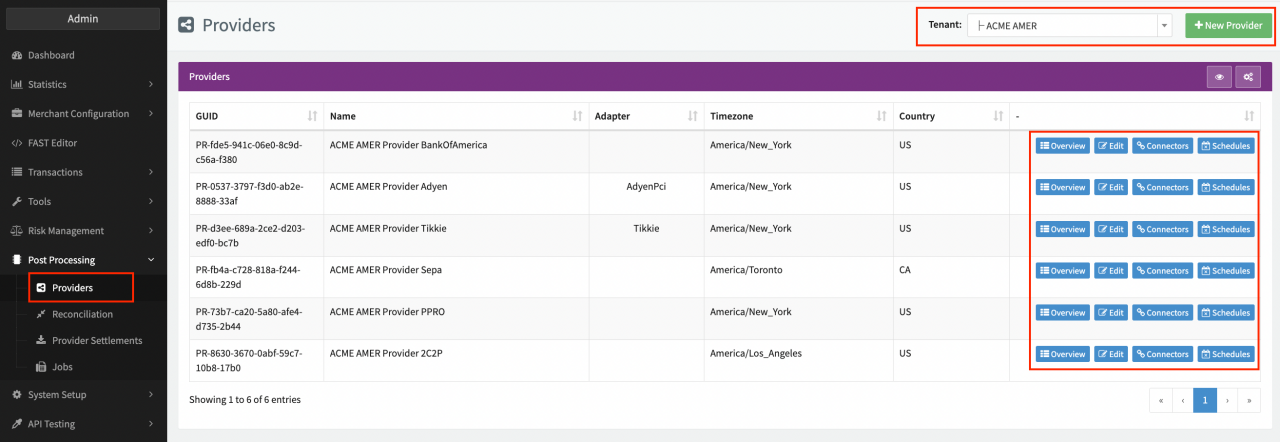 Provider Overview
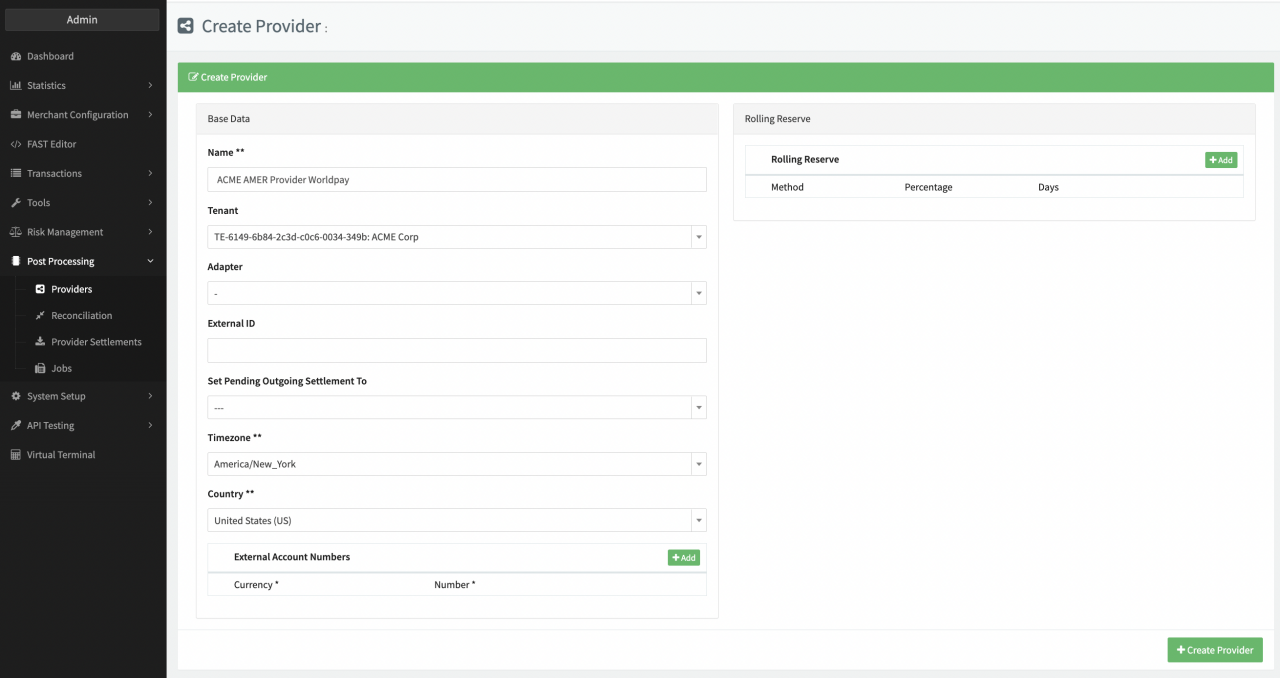 Create Provider
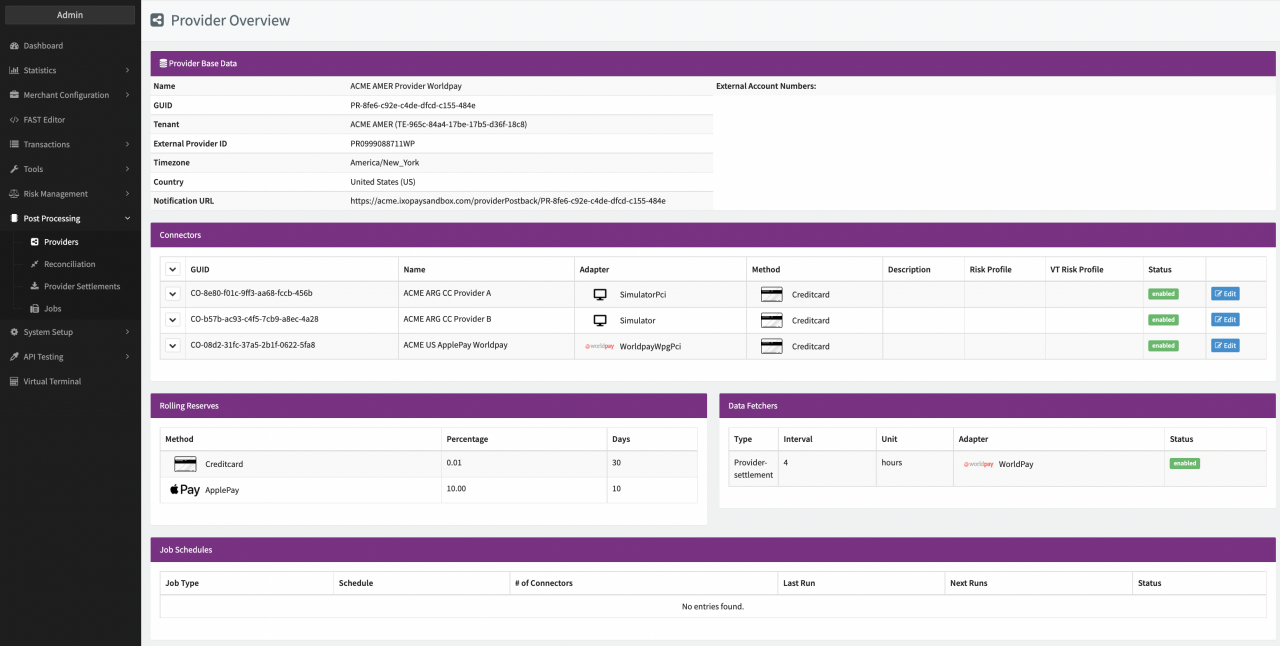 Provider Details Overview
Rolling Reserve is the process of securing a certain percentage of the processed Transaction volume for a defined time period to cover potential risks due to chargebacks. On Provider level the Rolling Reserve parameter can be added but is not used for further calculations.
Edit a Provider
To edit an existing Provider:
- Navigate to the Provider Overview.
- Select Edit for the Provider you want to make changes.
- Change the Provider Base Data or Rolling Reserve (see Create Provider).
- Click + Add in the Reconciliation Data Fetcher section (see also Post Processing - Reconciliation / Settlement on the Connector Level).
- Configure the Reconciliation Data Fetcher according to the adapter-specific documentation.
- Click + Add in the Provider Settlement Data Fetcher section (see also Post Processing - Reconciliation / Settlement on the Connector Level).
- Configure the Provider Settlement Data Fetcher according to the adapter-specific documentation.
- Additionally, you can configure Reconciliation and Provider Settlement Settings:
- Select a Setting and click + Add.
- Activate the Setting with 1.
- Click Save Provider.
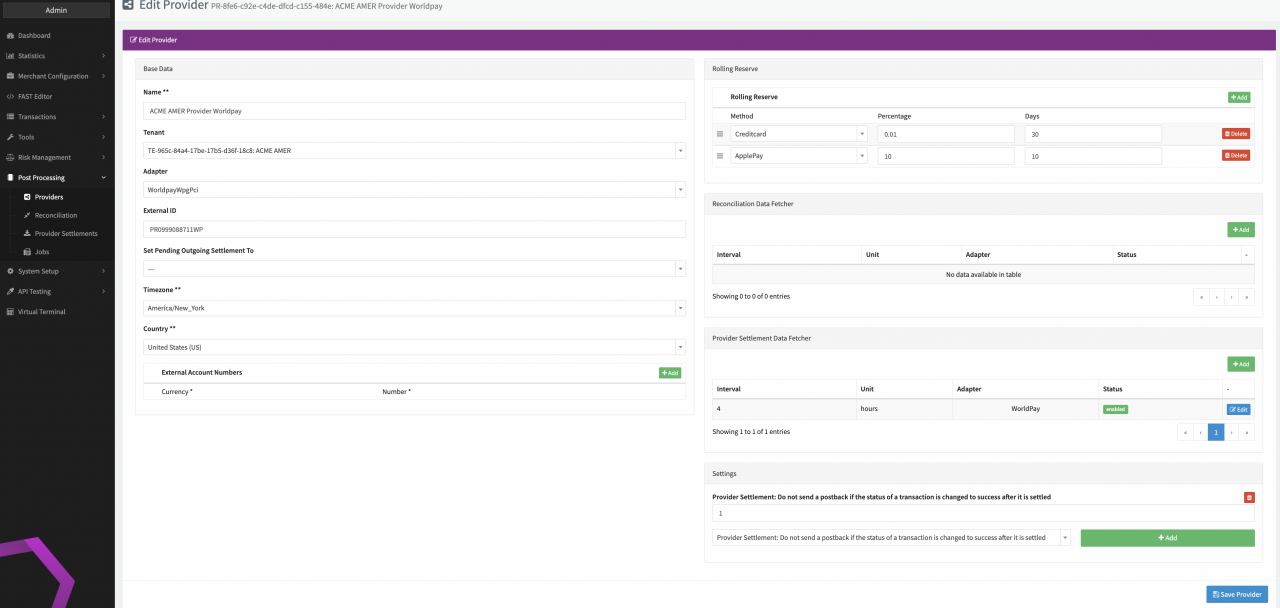 Edit Provider
Data Fetchers have implemented an input validation and Data Fetchers with an invalid configuration are automatically disabled. Nevertheless, manual upload of Settlement files is also possible for disabled Data Fetchers
Assign Connectors
In order to gather and process reconciliation and settlement data for multiple Merchants, you need to assign Connectors to the Provider in order for the IXOPAY platform to map transactions included in the Reconciliations / Settlements.
Follow these steps to assign Connectors to Providers:
- Navigate to the Provider Overview
- Click Connectors to get to the Overview of assigned Connectors
- Click + Assign Connectors
- Select the Merchant and/or Connector and click + Assign Connector
Alternatively, you can also Connectors to Providers in the Connector Base Data. The assigned Connector will appear in the Overview of assigned Connectors and in the Provider Details Overview. You can detach the Connector at any time.
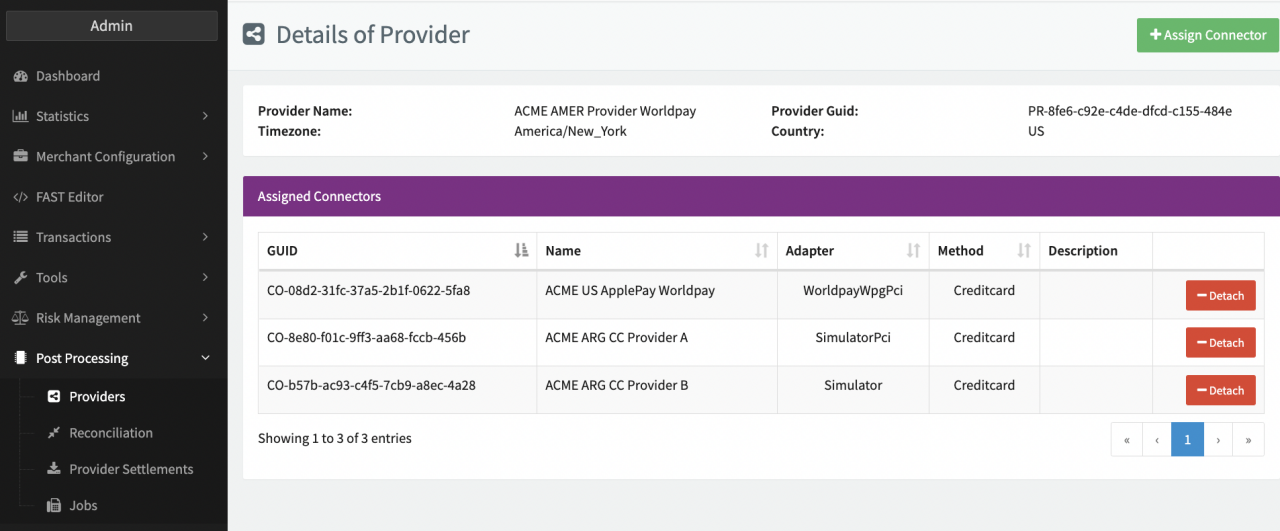 Assigned Connectors
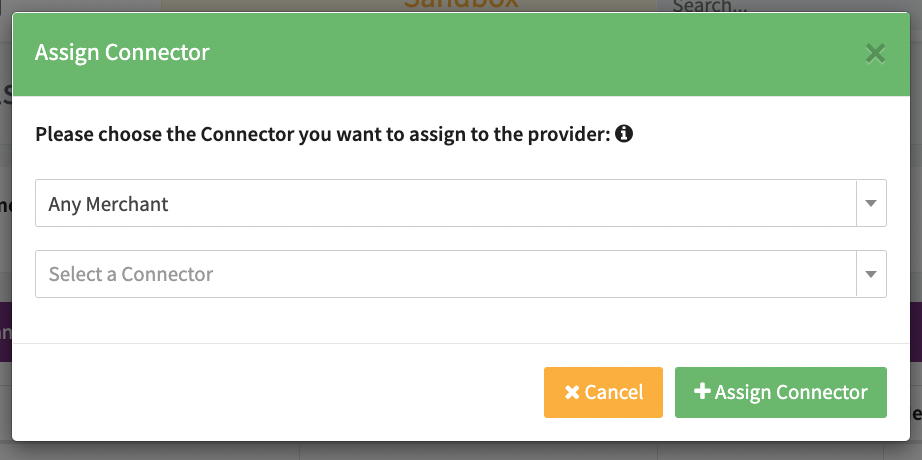 Assign new Connector
In order to avoid reconciliation and settlement conflicts, make sure to assign the Connectors before retrieving reconciliation and settlement data.
Schedule a Job
Lastly, you can also schedule Post Processing Jobs on Providers.
- Navigate to the Provider Overview.
- Click Schedules for the Provider you want to schedule a Post Processing Job for.
- Click + Create New Schedule in the Provider Schedule.
- Fill in the necessary information for the new Schedule (see New Schedule).
- Click + Create.
- Enable the Schedule (new schedules are deactivated by default).
You can edit and delete Schedules on the Provider level at any time.
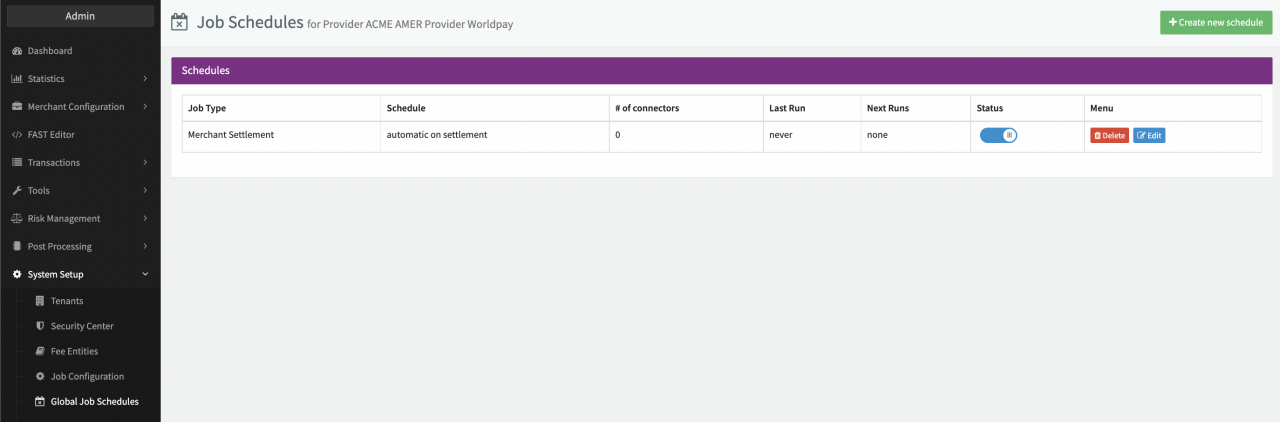 Provider Schedules
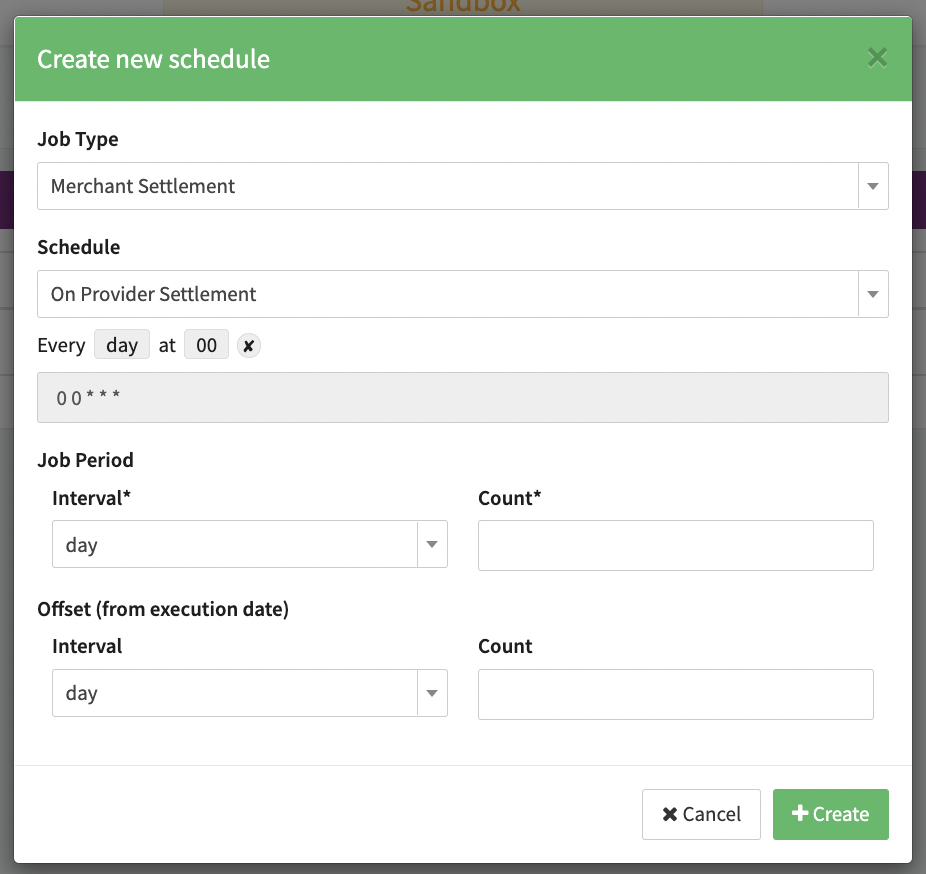 New Schedule